Doll Dressmaking Series: Sewing on Trim

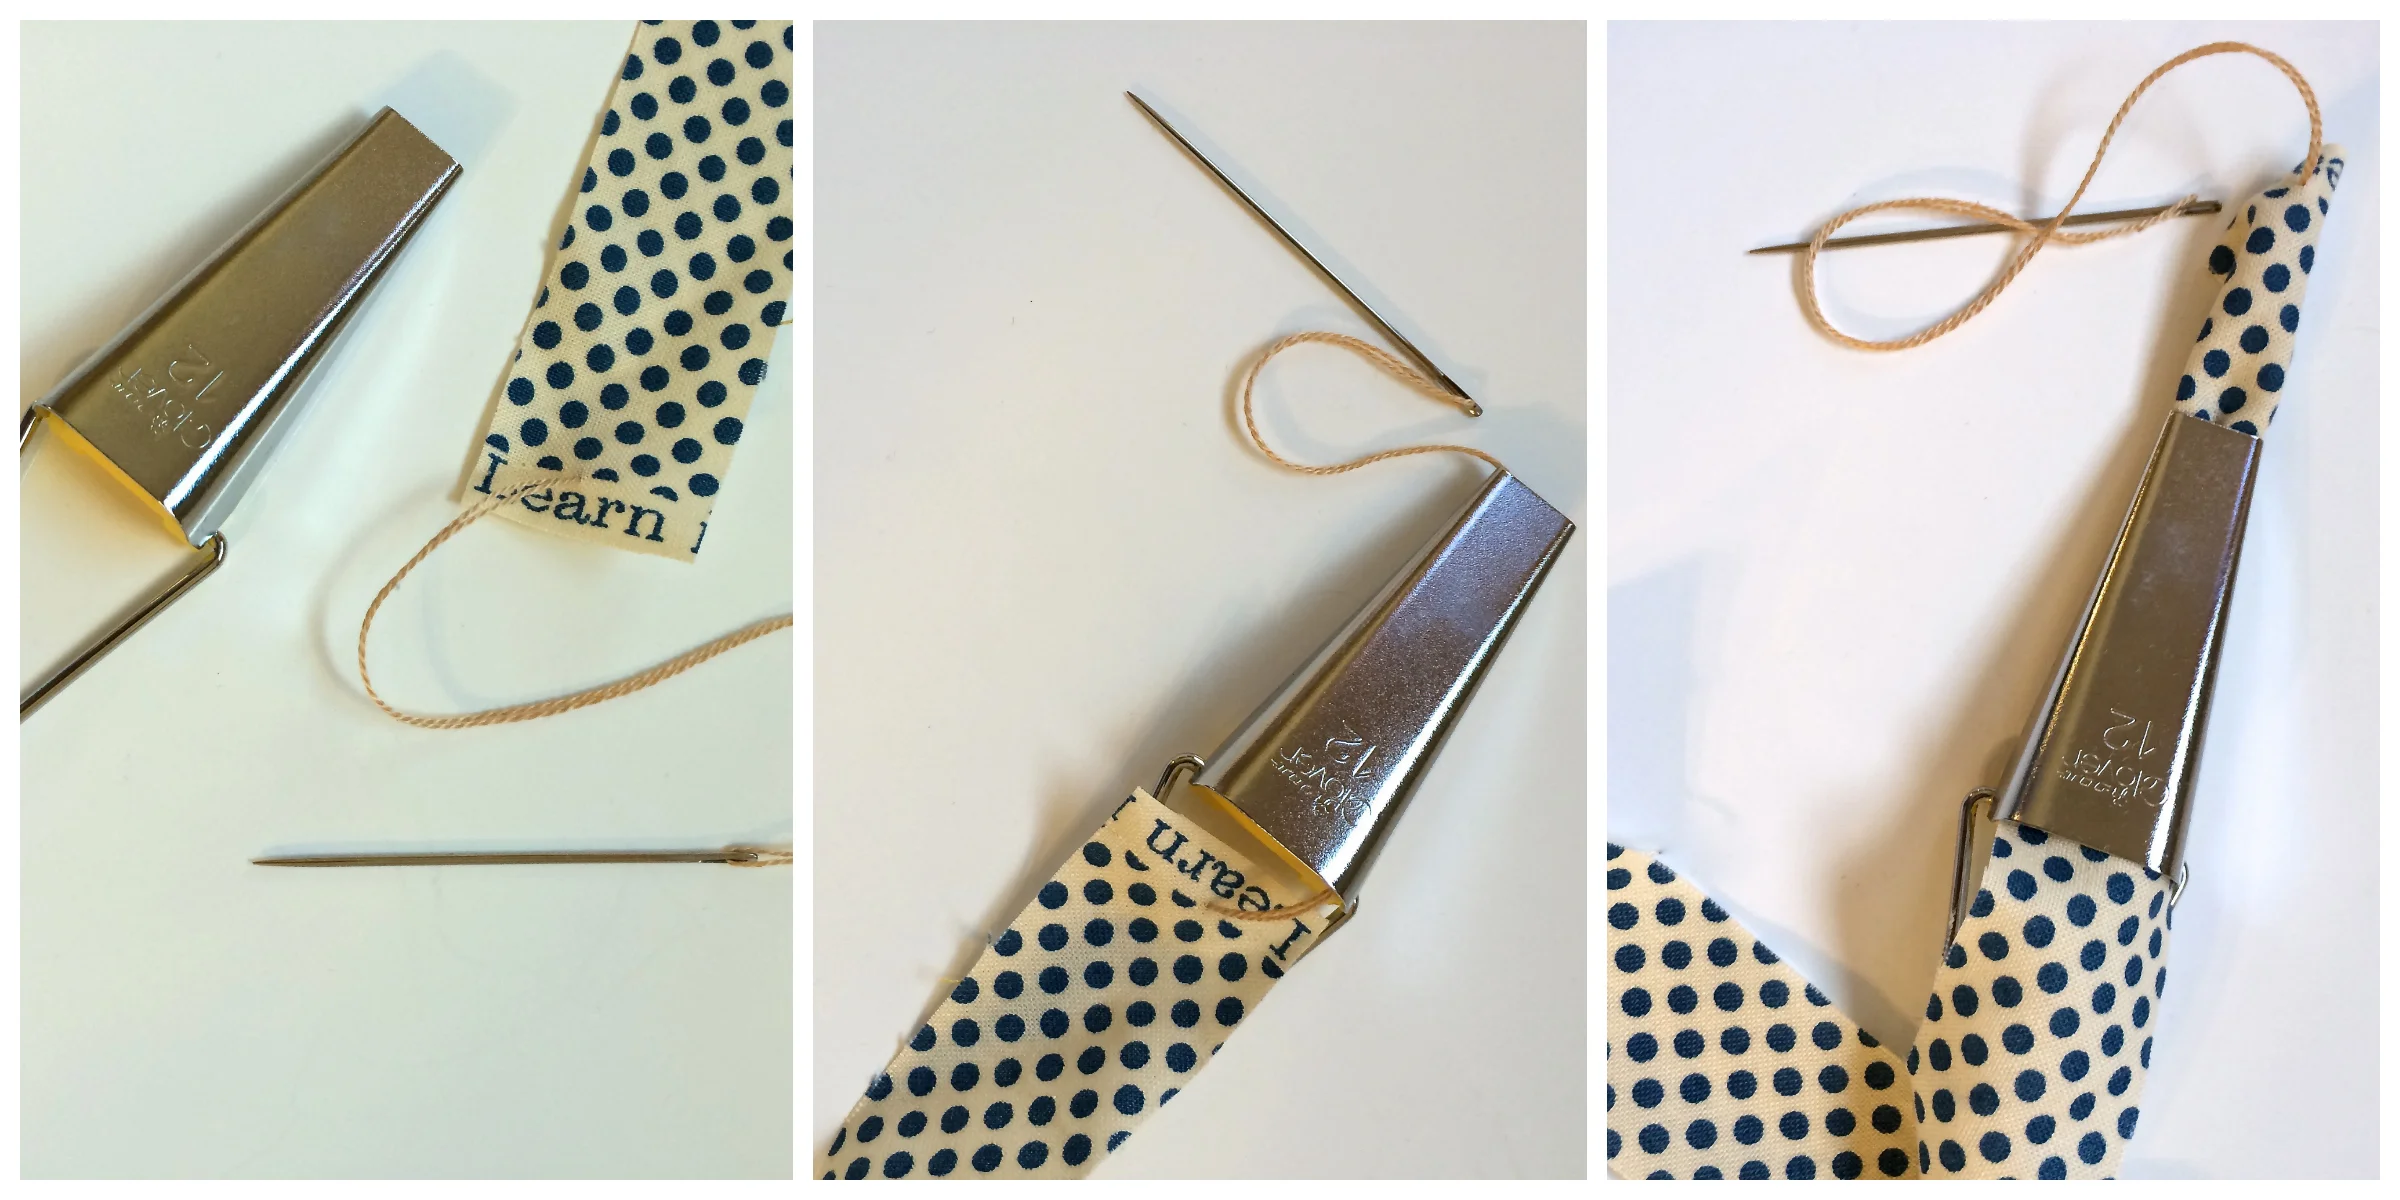
There are all kinds of trim and all kinds of ways to sew on trim. In my last dressmaking post, I covered making bias trim and sewing it on by hand. In this post I will show you how to sew bias trim on with your sewing machine. 

Sewing on bias trim with your sewing machine

Sewing on bias trim with your sewing machine

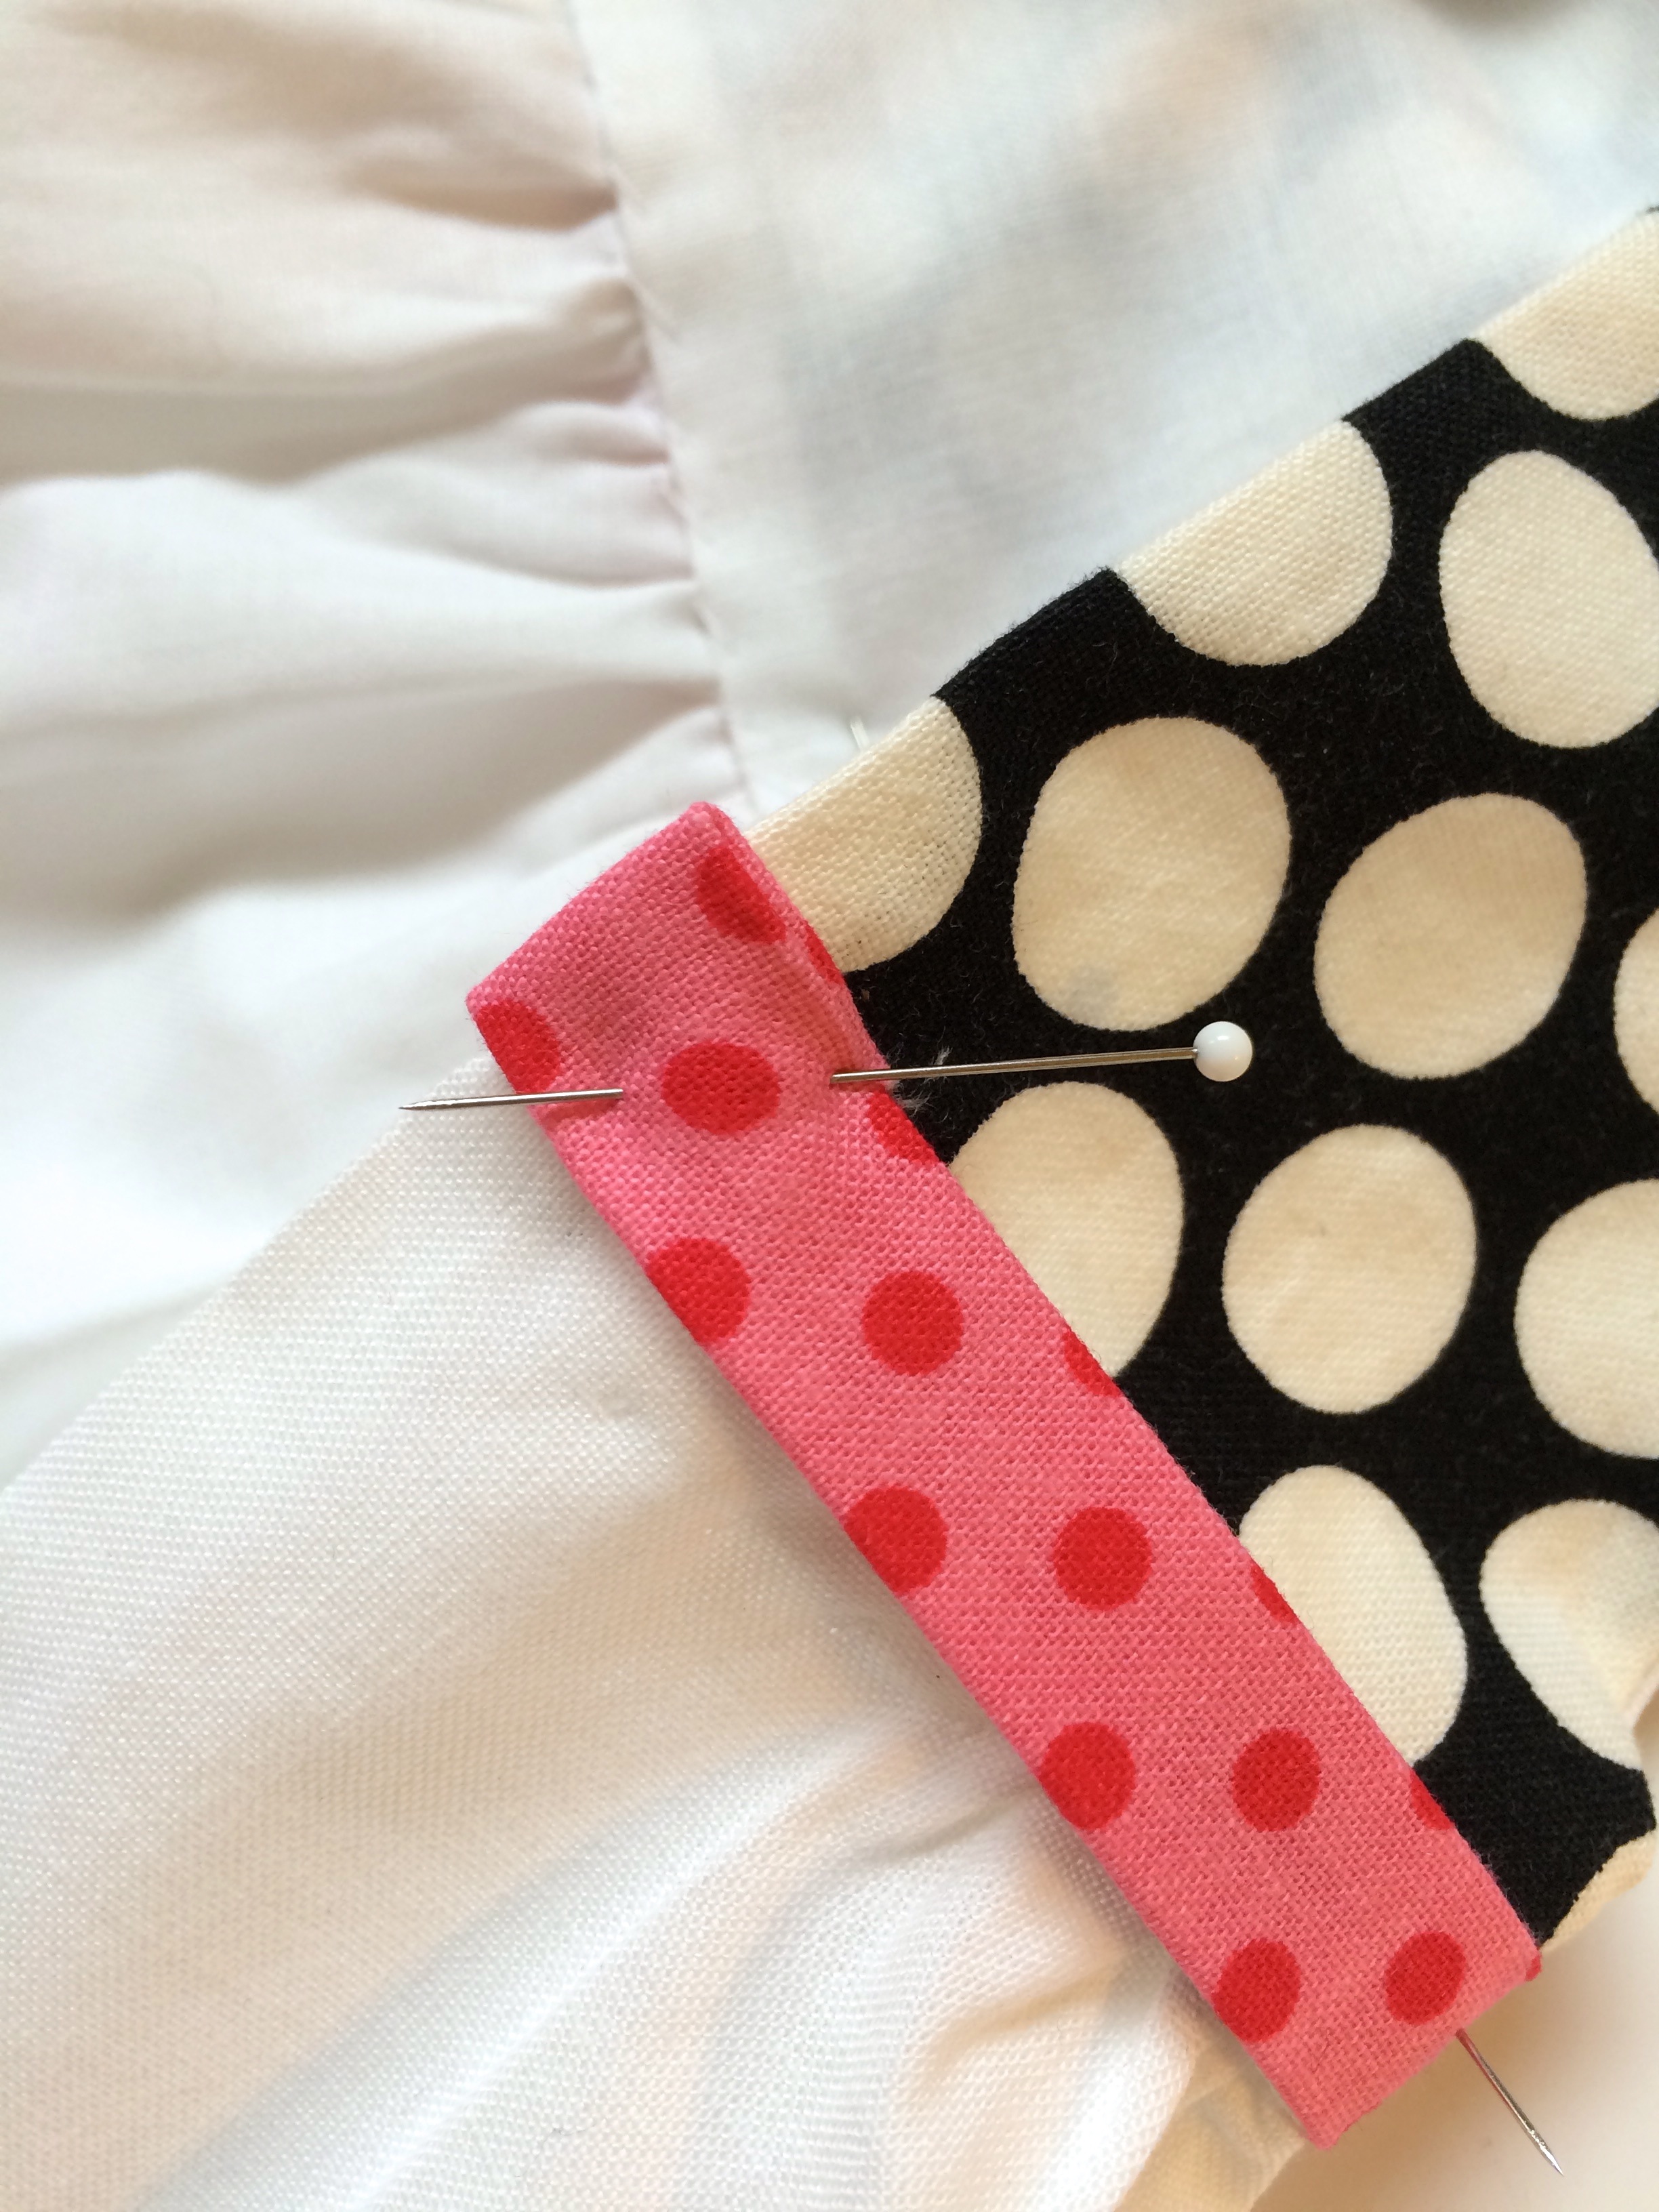
Pin bias trim on. Other than the end pins that secure the folded end, I keep the pins horizontal. With the pins horizontal, it is often possible to sew alongside of them with the machine, without hitting them.

If you are meticulous, you can measure to make sure your trim is an even distnace from the bottom. I eyeball it, after all these are doll clothes and a bit of wabi-sabi goes with the look.

Pinning your trim so you can sew.

Pinning your trim so you can sew.

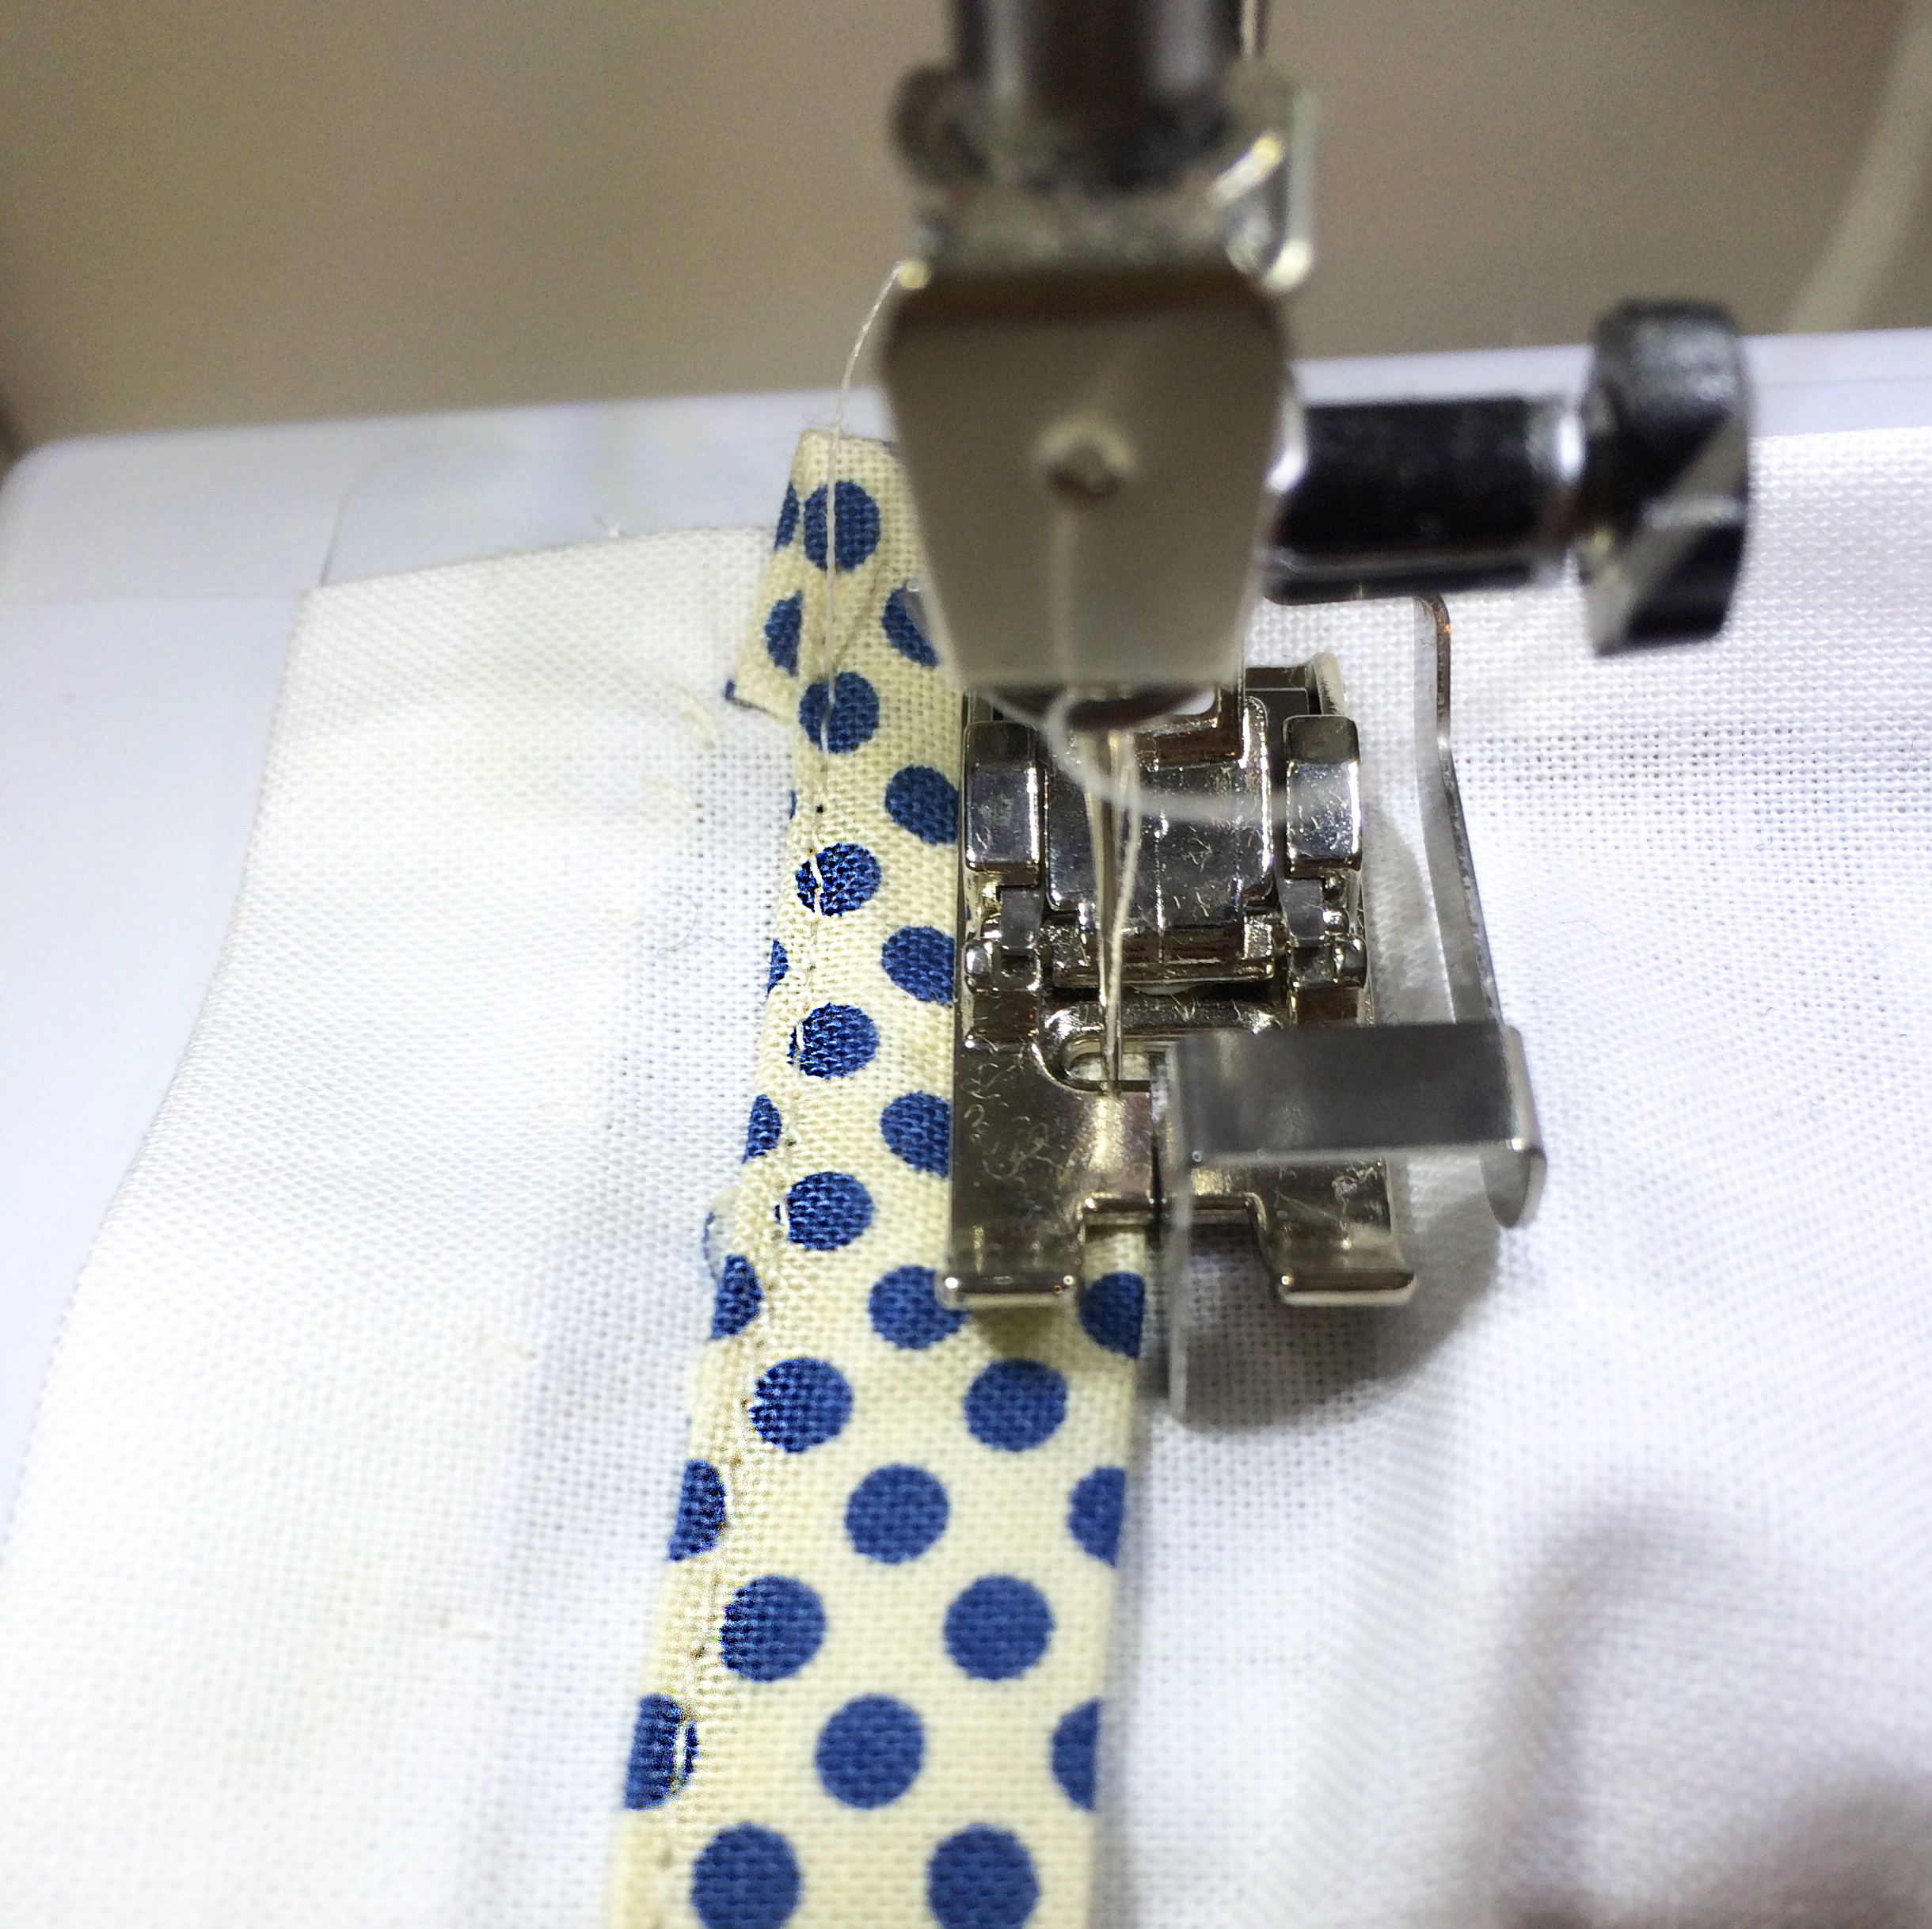
I sew most straight edged trim on with my edge stitch foot. I love this foot! Many sewing machines come with one. They also can be purchased. A great foot to have–there are many things it can do besides make sewing on trim a breeze. 

It has a guide that runs along the edge of trim or fabric, because the guide is guiding by the fabric edge, it keeps your stitches in a straight line and in an even distance from the edge. To change your distance from the edge, move your machine's needle more or less to the right or to the left.  

With this foot top stitching will look perfect, and if you've ever tried stitching in the ditch, this makes that easier. Some good info on this foot can be found:

Here

and

Here

The edge stitch foot: the best

The edge stitch foot: the best

I typically move my needle almost to the extreme left.

As soon as your presser foot is holding down the folded edge of the fabric, pull out that first pin. Begin sewing. The guide will be along the edge of your fabric and slightly to the left your needle will be stitching. Do the same for the other side of the trim.

Using an edge stitching foot for trim

Using an edge stitching foot for trim

Using an edge stitching foot for trim

Using an edge stitching foot for trim

Start with one trim, but more can be better.

Start with one trim, but more can be better.

If you do not have en edge stitch foot, you can sew on trim with a regular foot. 

  1. Use a point on your foot as the guide.
  2. The guide should follow the edge of the fabric.
  3. If you have a needle down option, this can help.
  4. Have the needle slightly to the left of the guide.
  5. You will need to take pins out as you go.
Using a regular foot

Using a regular foot

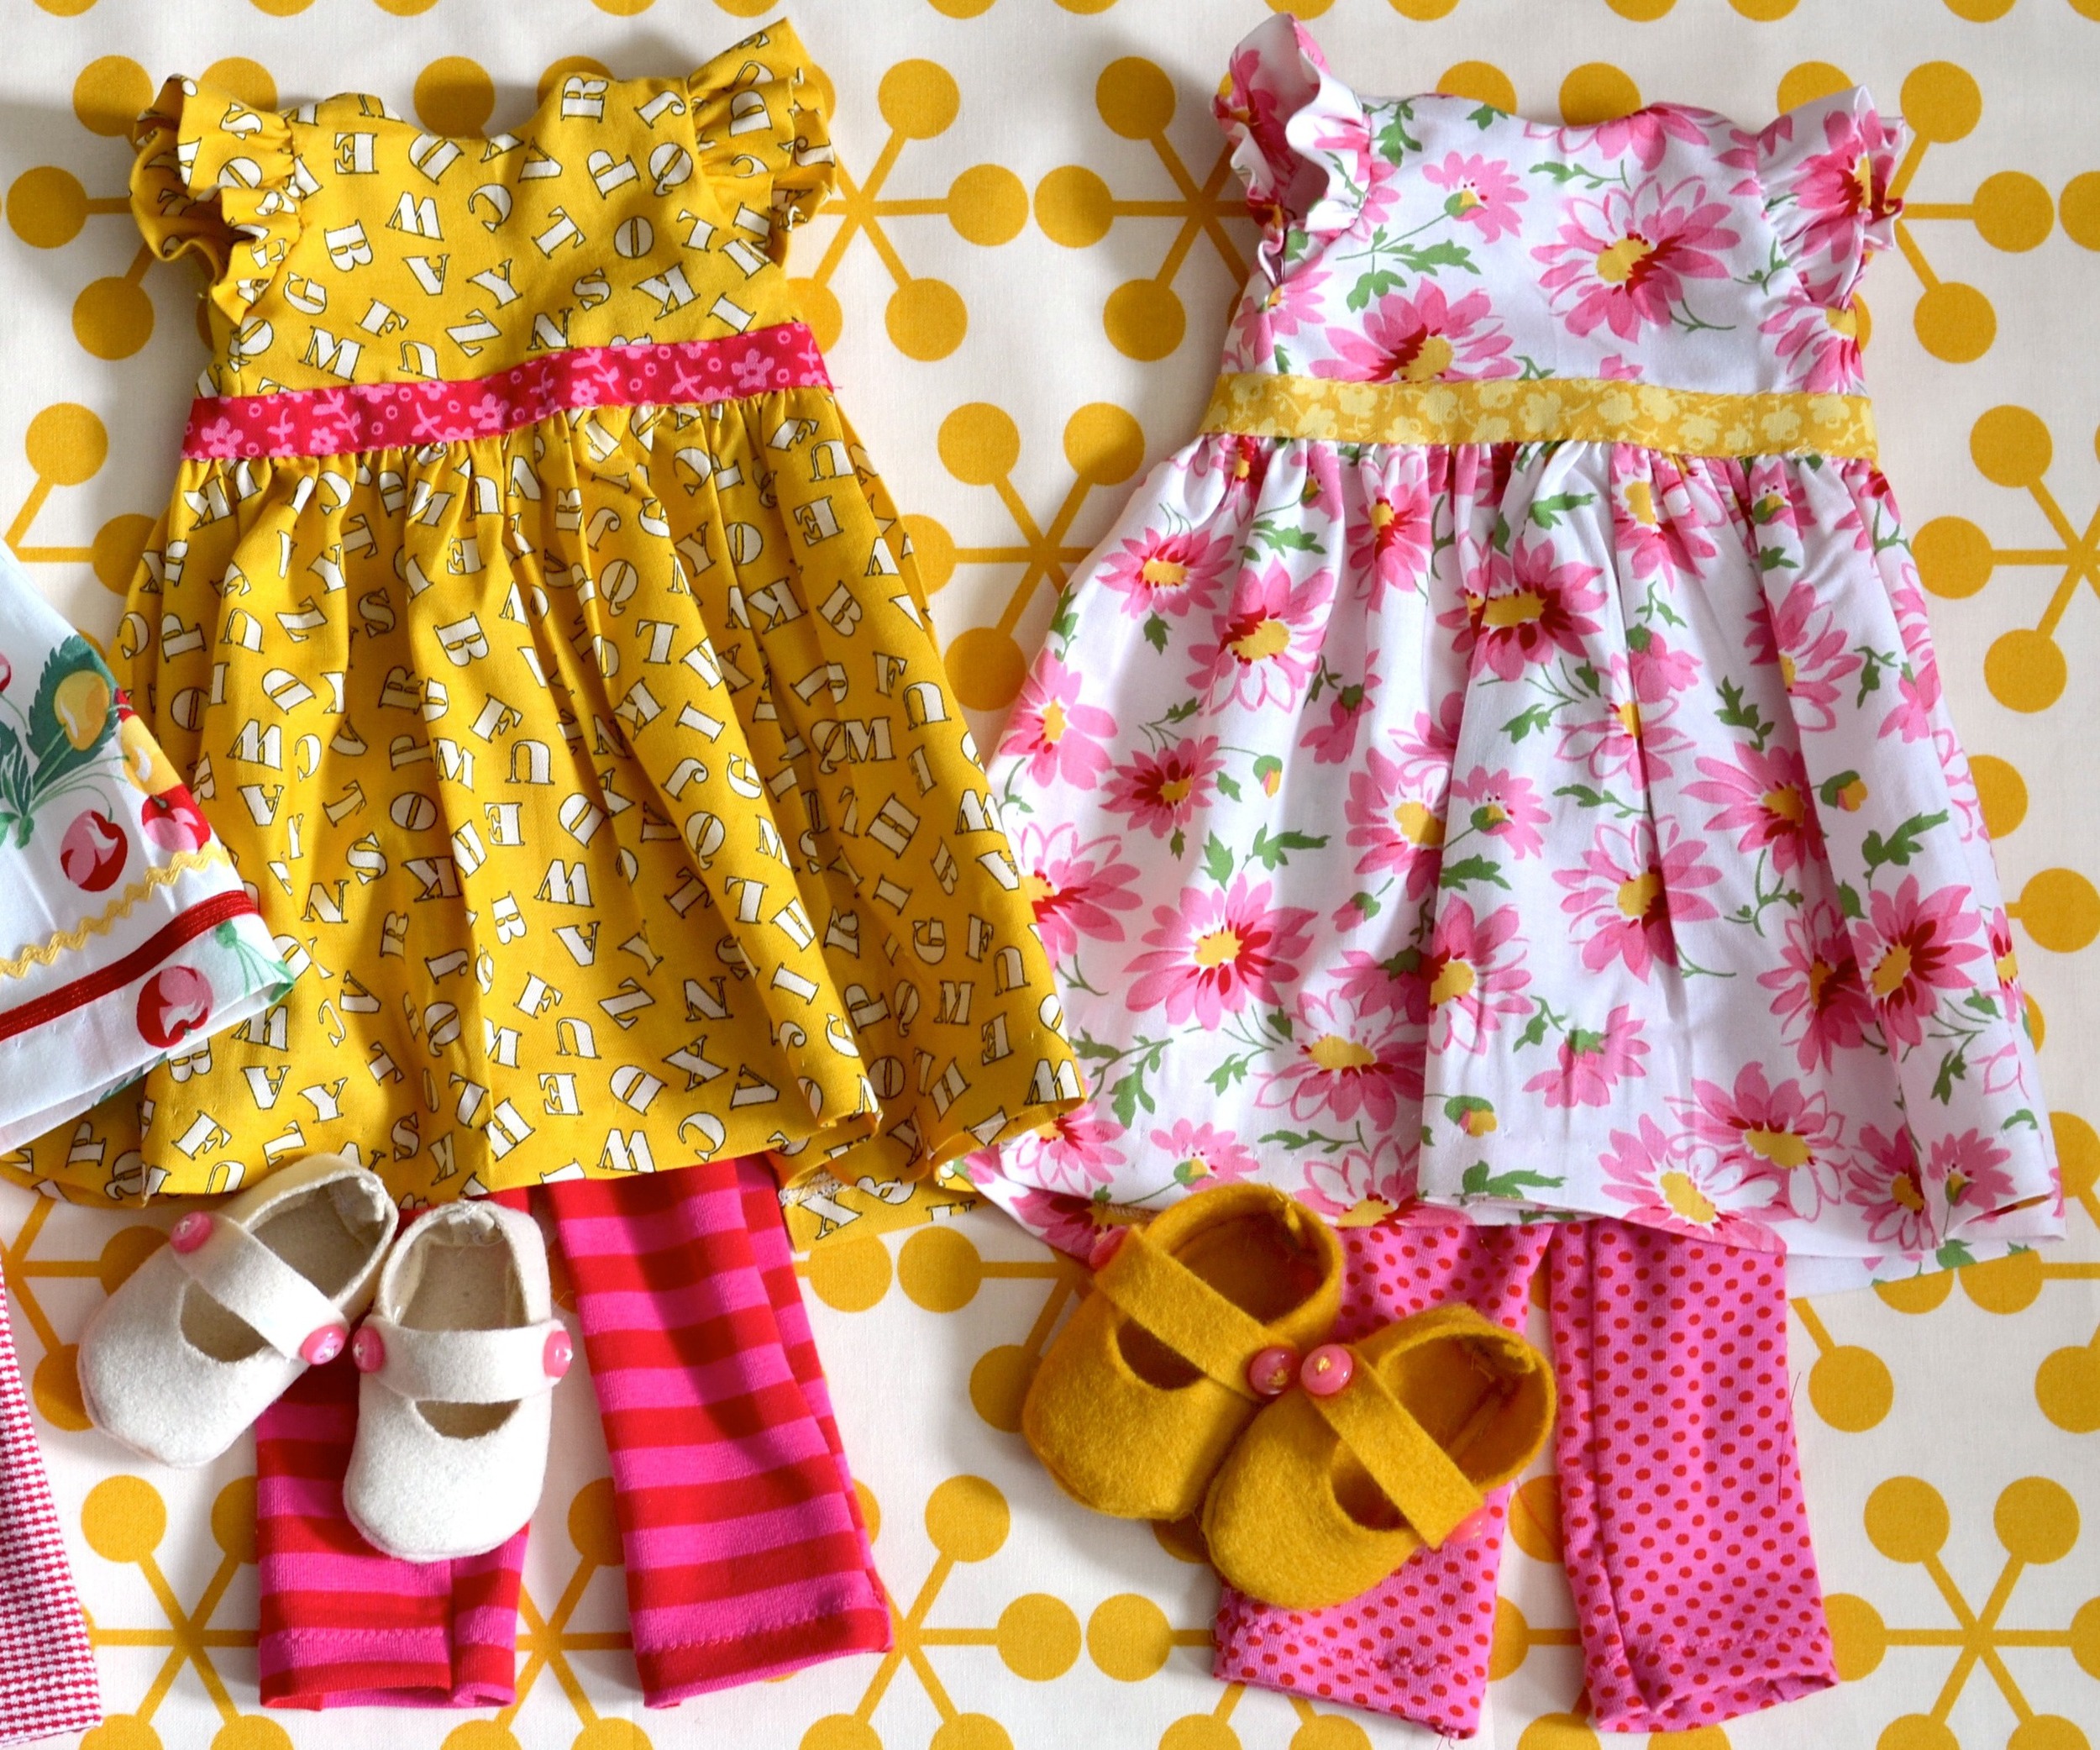
It's fun to play with sewing on trim combinations.

Sewing on Trim 81pS.jpg

Doll Dressmaking Series:Dress with a bodice and gathered skirt

Last week, you learned reversible dress.  From the photos I have received, at least some of you got that down fairly easily. This next dress uses a few skills learned from that dress for a new style of dressβ€”a dress with a bodice and gathered skirt.

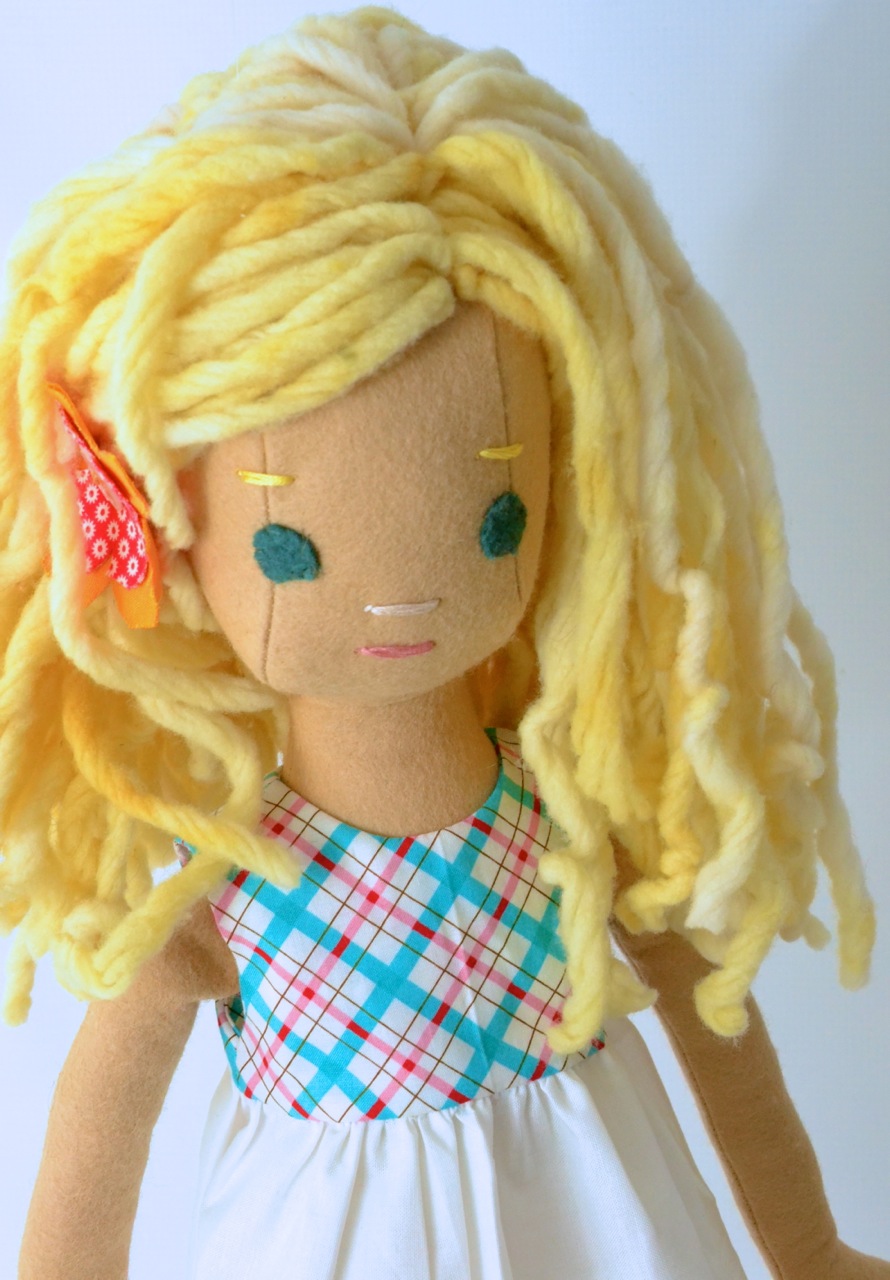
Doll Dressmaking: A dress with a bodice and gathered skirt.

Doll Dressmaking: A dress with a bodice and gathered skirt.

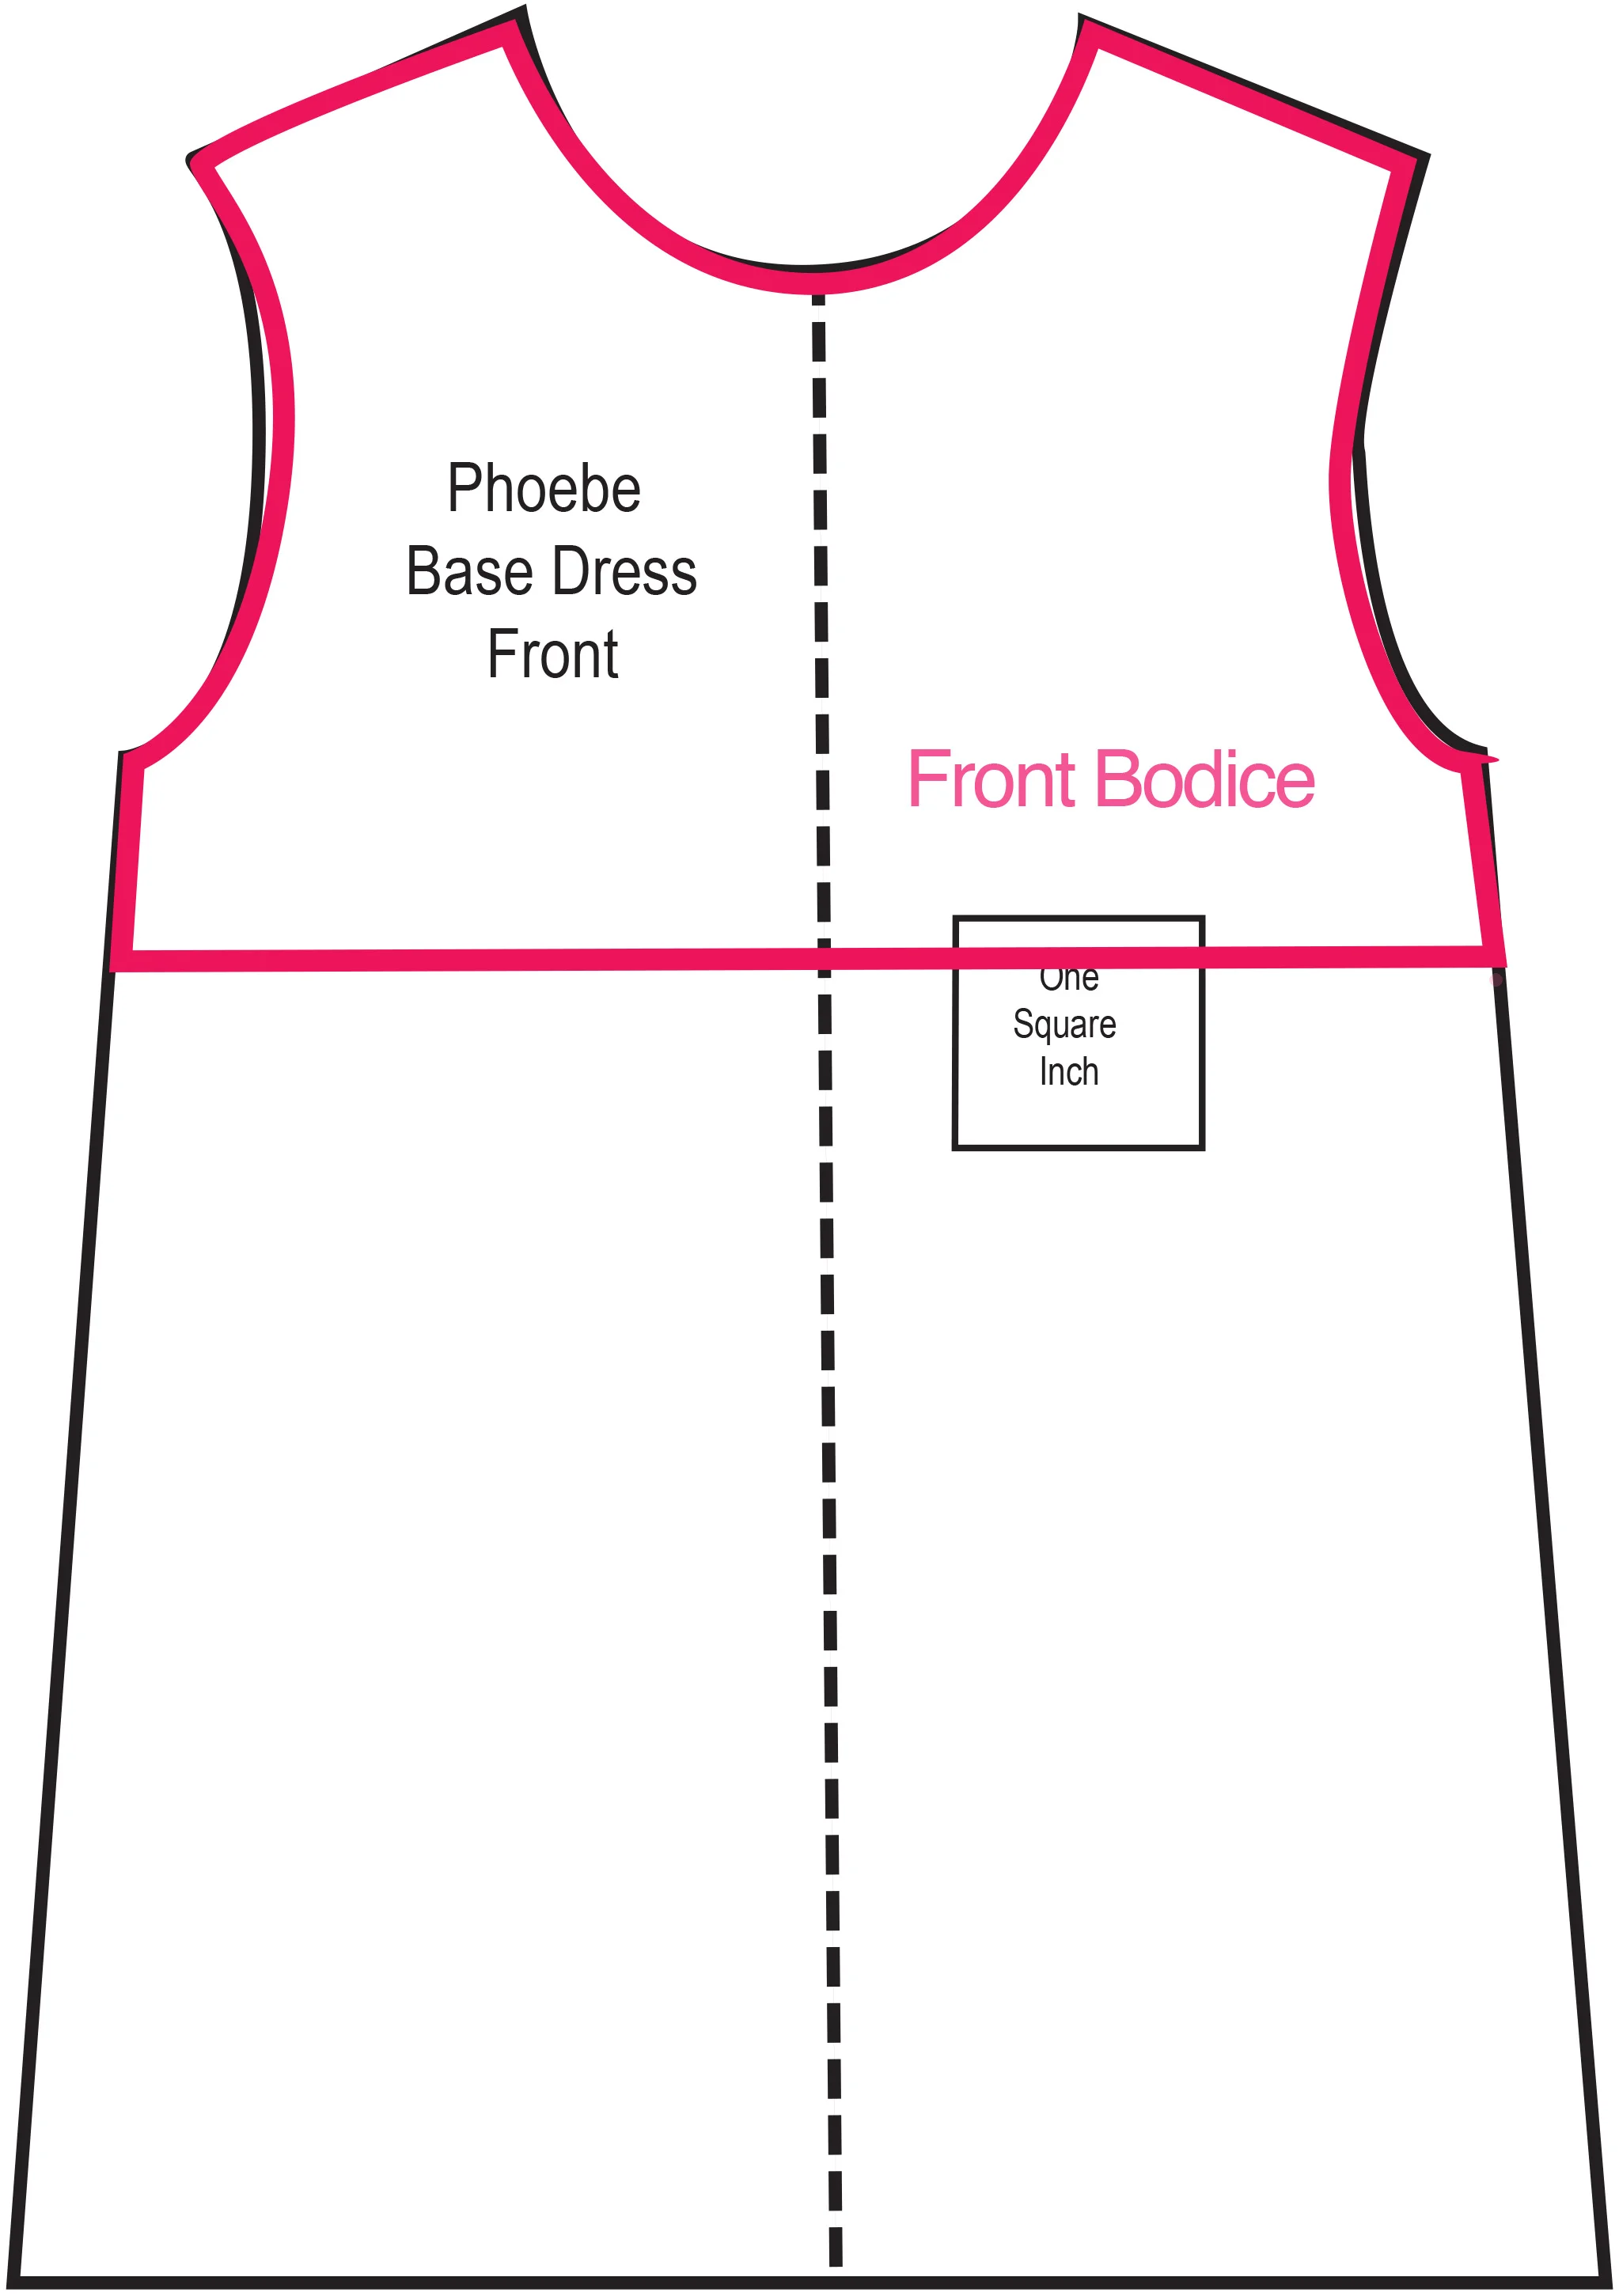
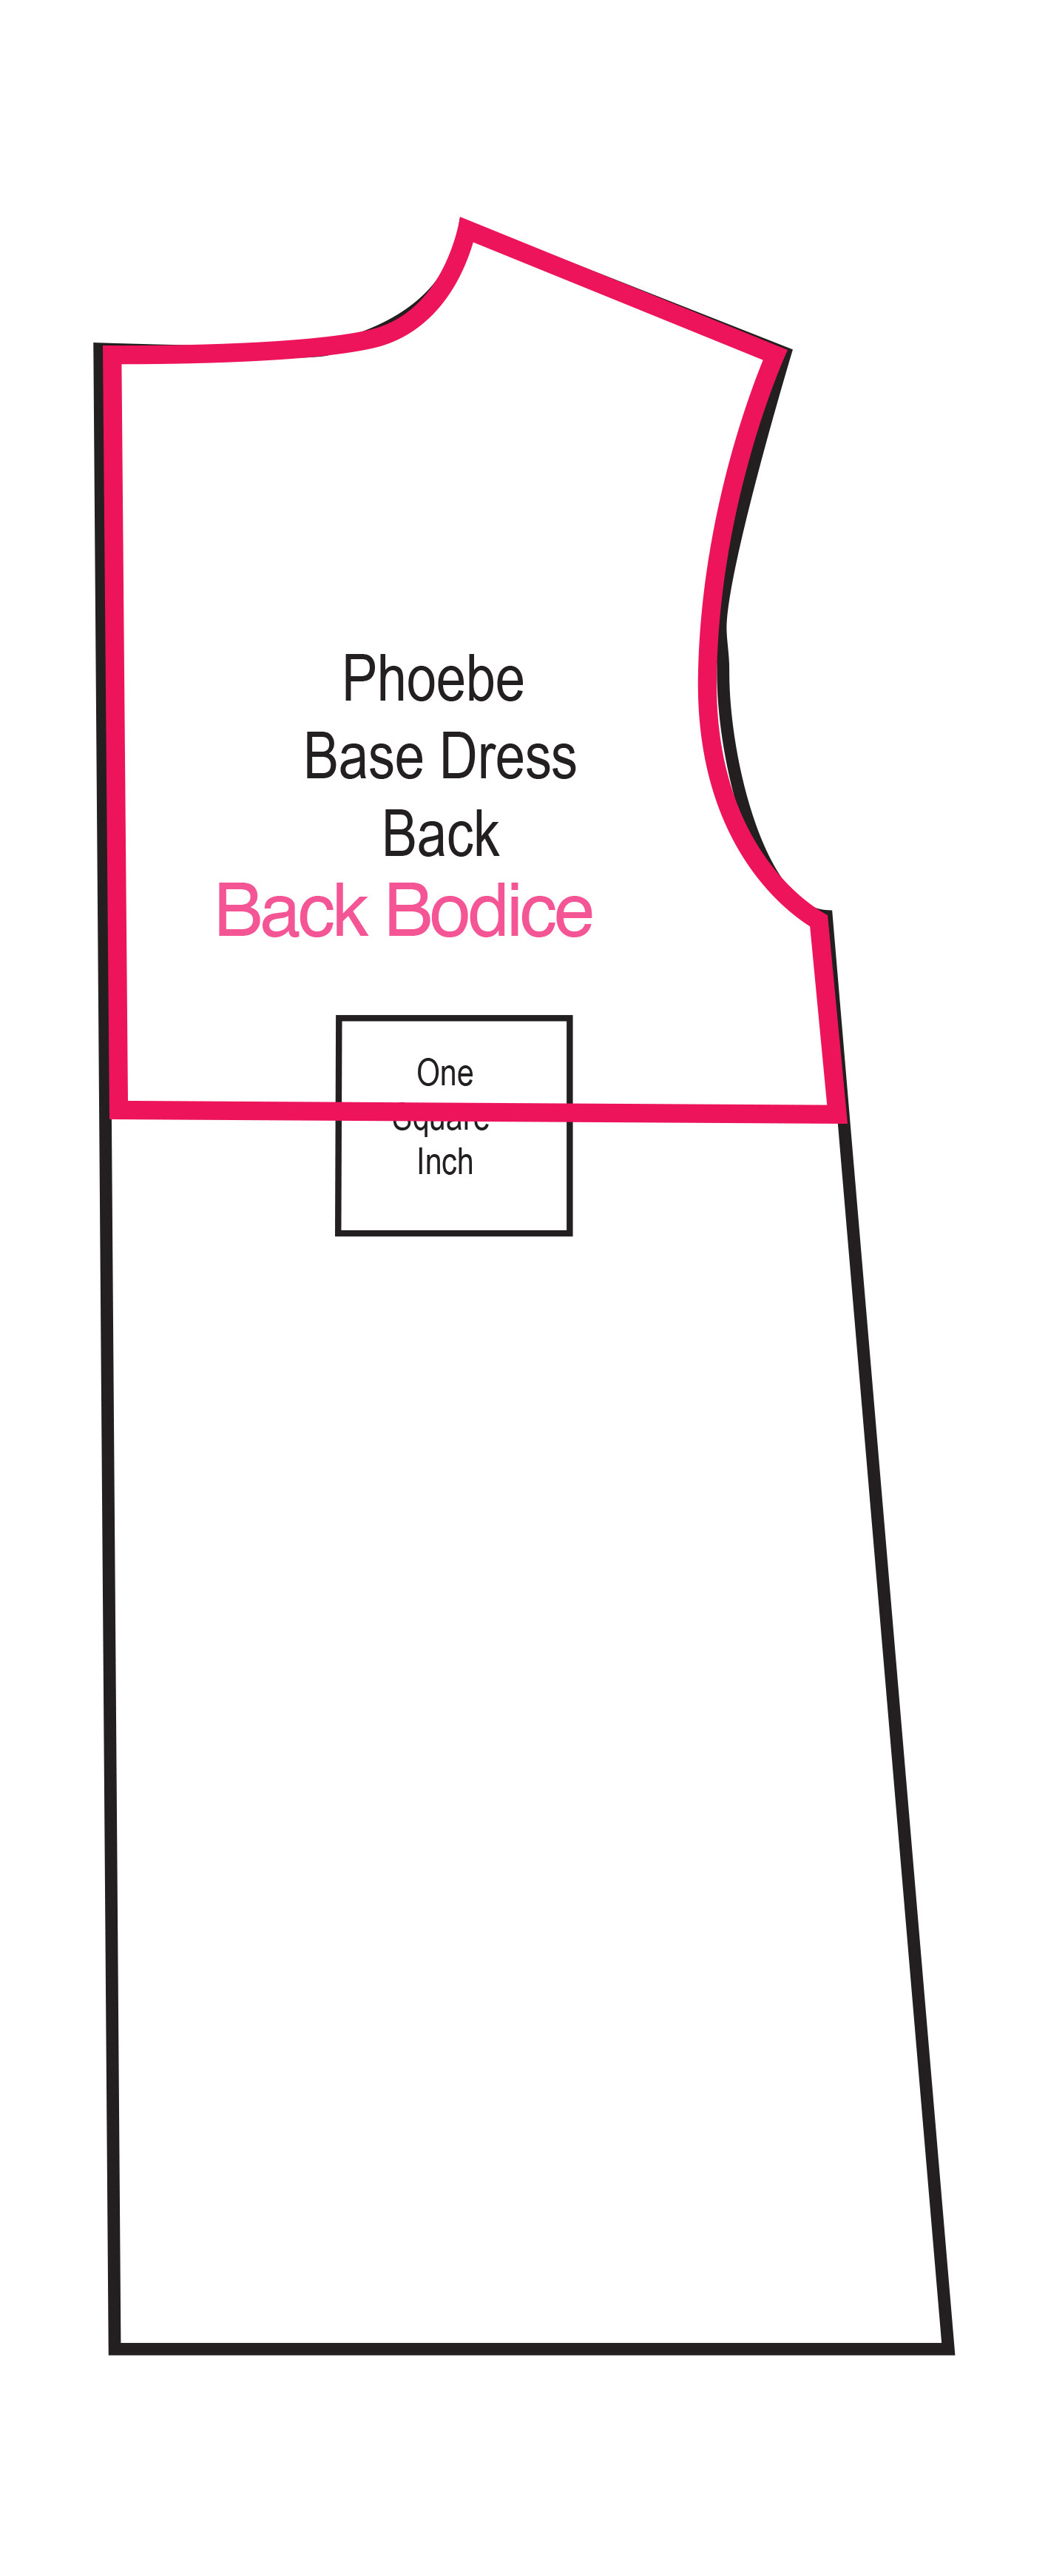
The bodice pattern piece can easily be made from your basic dress pattern. Choose where you want your bodice to end and end the pattern piece about 1/3 of an inch beyond that. 

Making your bodice pattern piece.
Phoebe Bodice back drawing.jpg

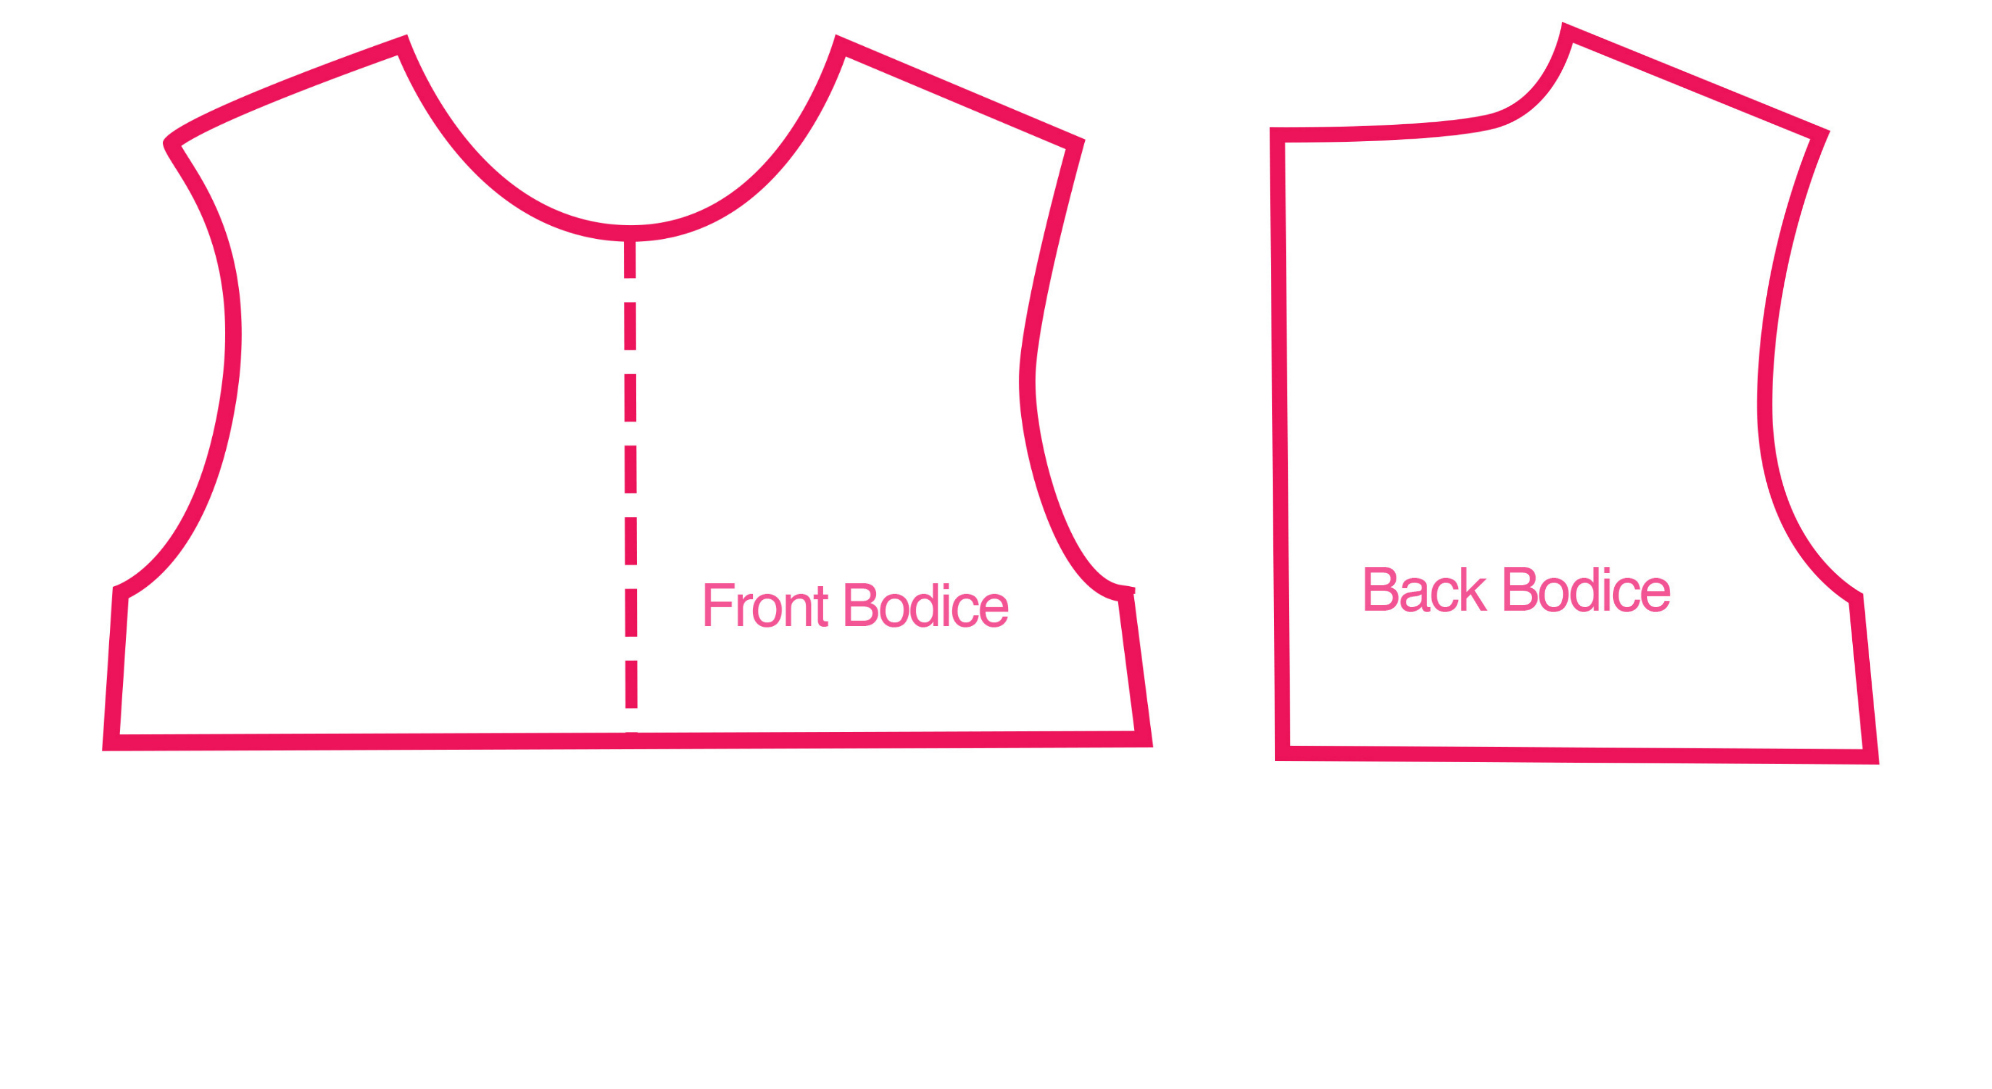
You will end up with two bodice pieces, one for the front and one for the back. You will need two of each, because you will be making a lining for the bodice.

Bodice pieces

The pattern piece for your skirt is basically a rectangle. For Phoebe I used a 10.5"x8" pattern piece, to be placed on the fold. this will give me a 21 x 8" piece of fabric for the skirt.

For the Waldorf Doll and the American Girl Doll I would make the skirt pattern piece 12"x8". The 8 inch side will go on the fold, giving you a 24"x8" skirt.

Ultimately the skirt size will come down to taste, how full do you like your gathering, how long do you like the skirt? I don't like my gathering very full.

Start by making the bodice.

1. Pin and cut two bodices, one for the outside, one for the lining. I used the same fabric for both, but you switch it up.

2. sew all four shoulder seams.

3. Press.

Click to enlarge.

1. Sew neck and back edges and armholes as you did in the lined reversible dress tutorial.  Right sides together.

2. Turn right side out. Press.

3. Sew side seams as you did in the reversible dress.

Click to enlarge

Finish the two 8 inch edges of the skirt. these will be a part of the back closing of the dress.

1. Iron each edge over 1/4 inch.

2. Fold over again and stitch.

Click to enlarge

Next is gathering the skirt:

1. Set your machine stitch to its longest length. On most machines, it is 5.

2. Start your first line os stitches by reversing for a few stitches, as you would most seams, to secure the stitching. But do not secure the end of the stitching. Instead leave a long thread that you can grab and pull.

3. An eighth of an inch away, repeat. You now have two rows of long stitches, secured at the beginning, with long threads at the end.

4. Take the two threads from one side of the fabric (depicted in red on my sewing) and gently pull.

5. Pull the threads until the skirt is gathered and the same length as the bottom of the bodice. Even out the gathers. 

Still confused by gathering:

Craft Cupboard has a good tutorial.

and so does Craftsy.

Click to enlarge.

1. Secure gathering by winding thread around a pin.

2. Pin gathered skirt to the outside fabric of the bodice. Right sides together.

3.  Stitch along the lower row of gathering stitches. 

Click to enlarge

1. Fold bodice lining in about 1/4 inch.

2. Hand stitch with a hem (edge) stitch to hold in place, keeping raw edge of skirt tucked in while you sew.

Click to enlarge

Your dress is almost done. 

1. Hem to desired length.

2. Press.

3. Add trim if desired.

Β 

There are lot of ways to change this dress up. trims, contrasting fabric, the same fabric. Different types of fabric (wool, tulle, silk...

Have fun and send photos!

Bodice dress tutorial
Bodice dress tuorial

Doll Dressmaking Series: The Reversible Dress

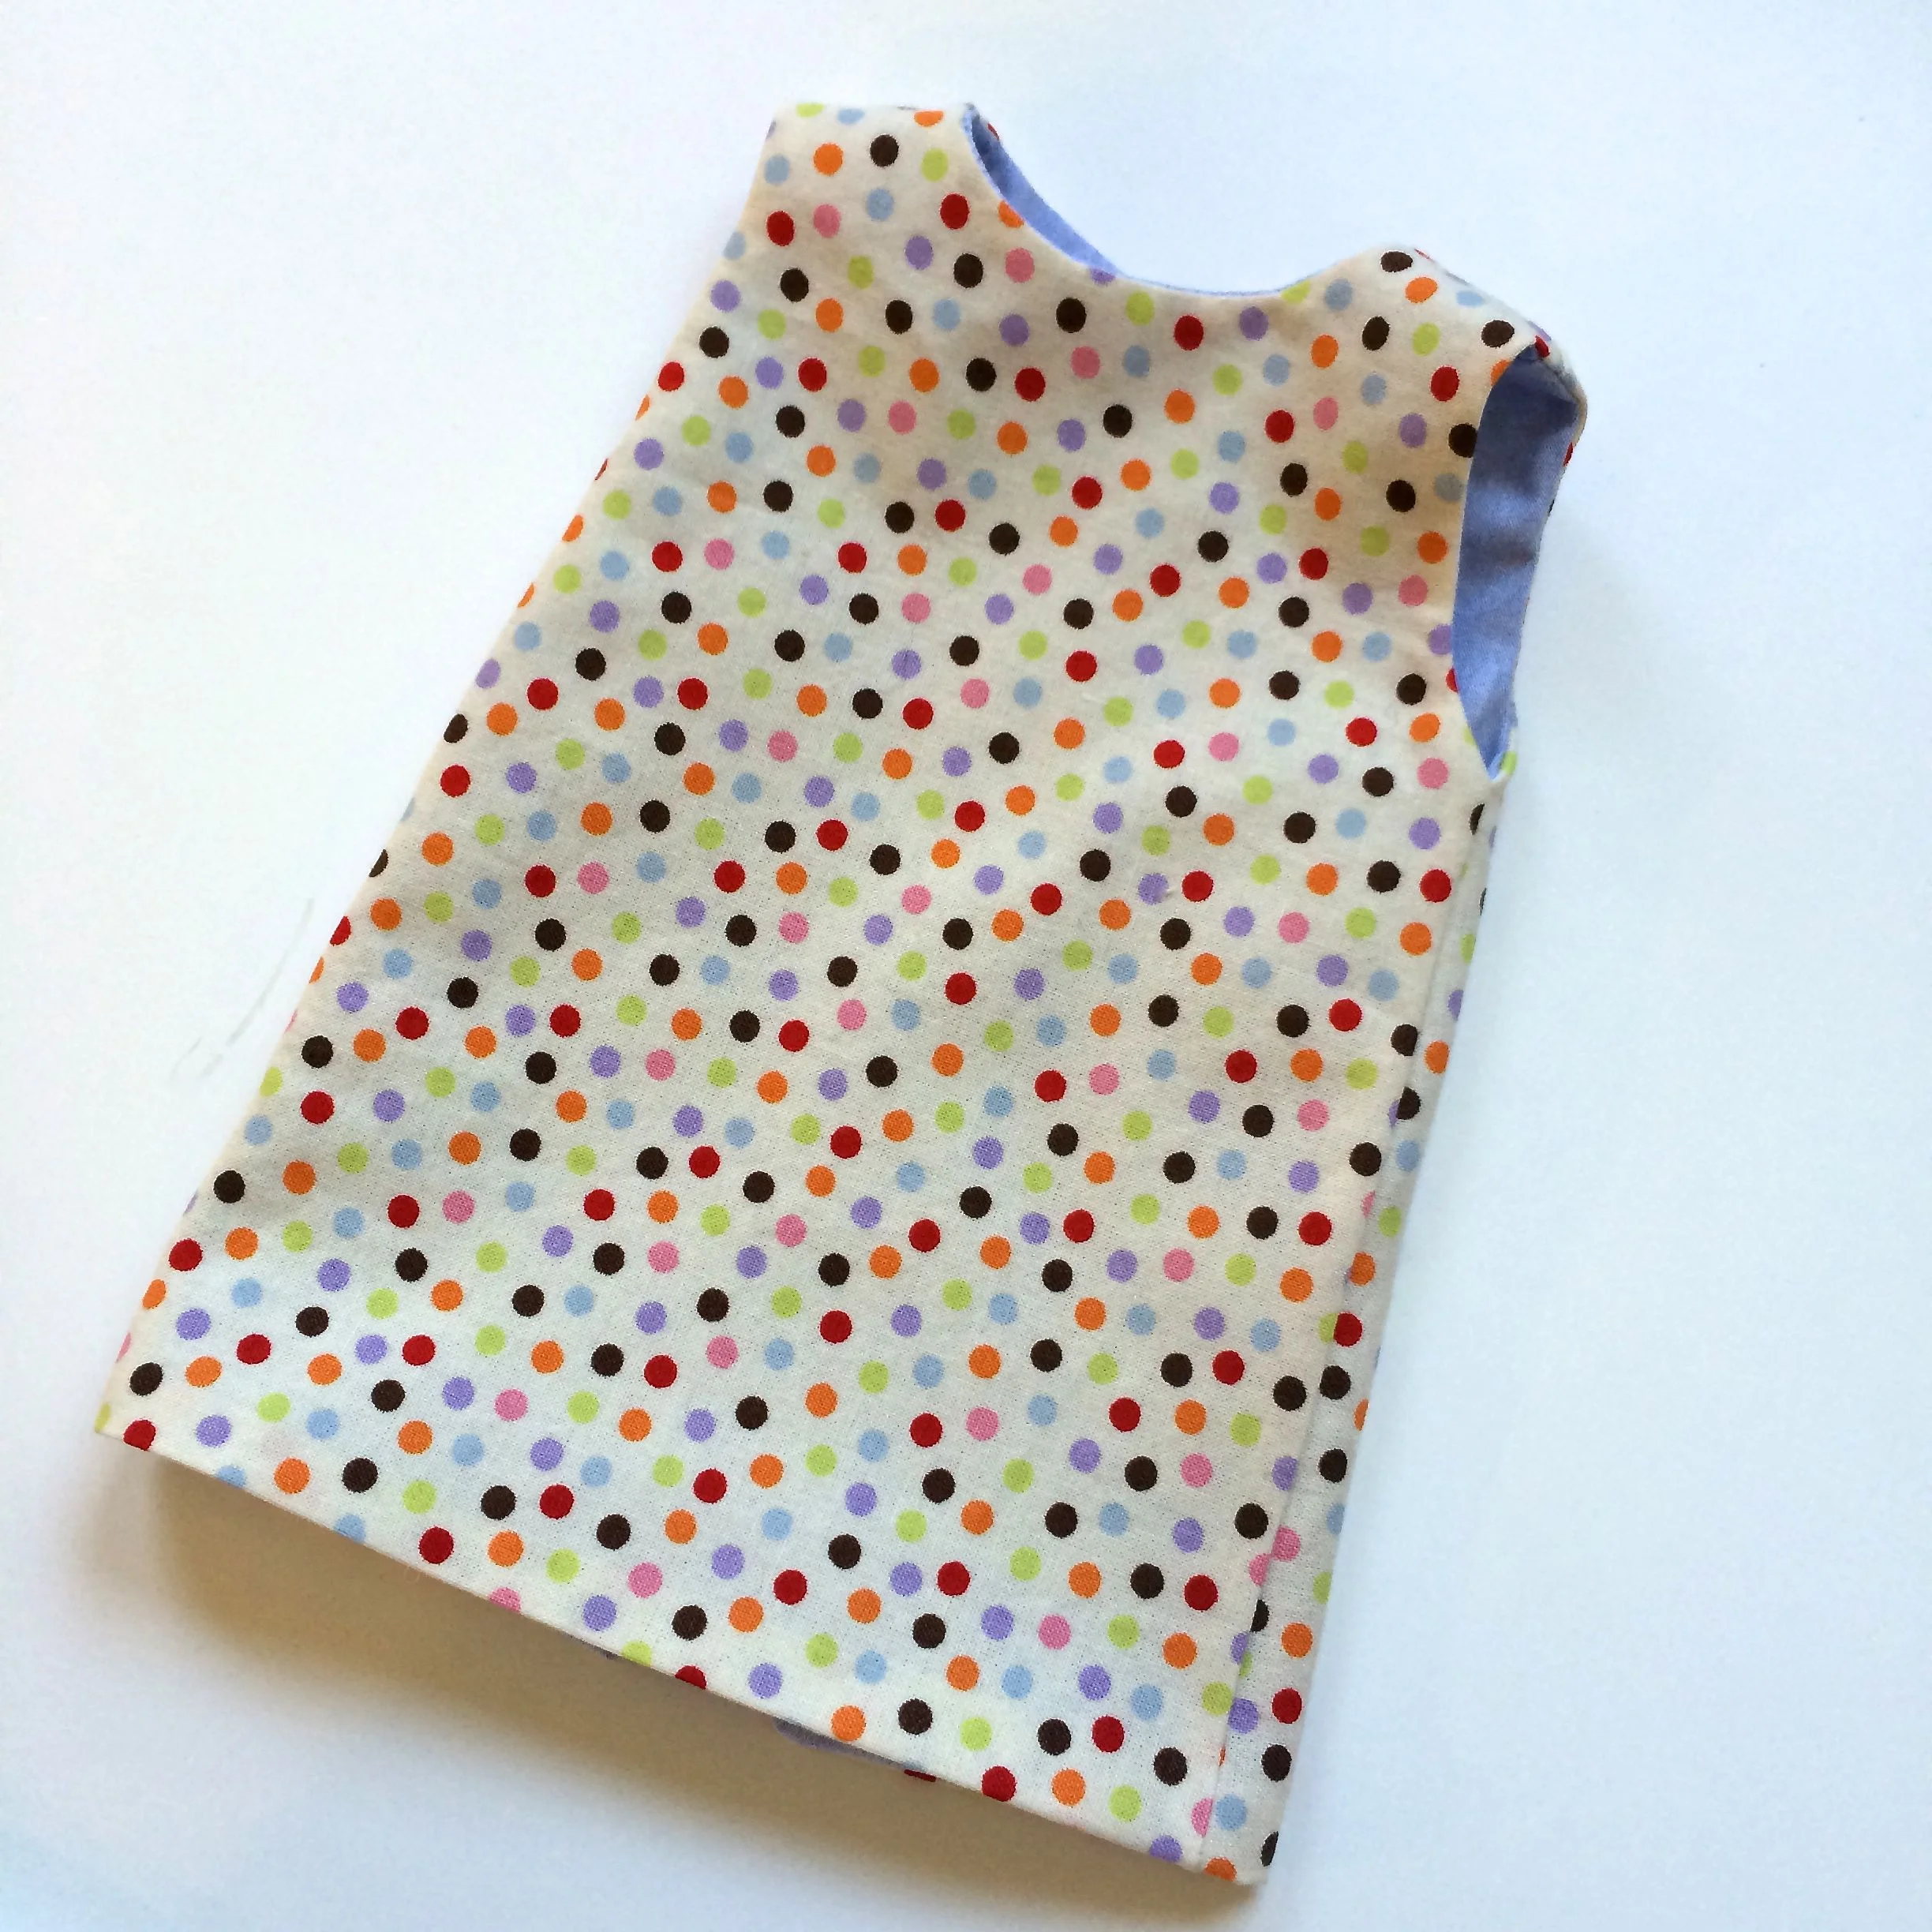
In my last post, I showed you how make a facing for a basic doll dress. A facing is one way to finish raw edges. When you line a simple sleeveless dress, you something extra, a reversible  dress. Cute, simple and a bit magical from a child's point of view.

How to line a simple doll dress. Makes a sweet reversible dress.

How to line a simple doll dress. Makes a sweet reversible dress.

There are several things to consider when choosing your two fabrics:

  1. Fabric weight. Quilting cotton is as heavy as you can go. Two layers of anything heavier at a doll's size will be too bulky and the seams will get bunchy.
  2. Color. Quilting cotton is not completely opaque. So choose  fabrics where you won't see one fabric through the other. Bothe light or both dark. 
  3. If you just want a lining, white is fine. White cotton lawn is good too, since it is so lightweight.
  4. Don't choose something that shreds or unravels too easily, like many linens. With a quarter inch seams, you may have some unraveling seams and once the dress is finished and "sealed up" you have no way of going back in and fixing any seam gaps. For one fabric I used quilting cotton, but for the other I used oxford cloth shirting, which does fray a bit.

Make two copies of your basic dress pattern and pin and cut one out of each fabric.

There are several things to consider when choosing your two fabrics.

There are several things to consider when choosing your two fabrics.

Next sew together the shoulder seams for each fabric as though they were two independent dresses. Press the seams flat.

Pressing seams is a good habit and makes everything look better.

Pressing seams is a good habit and makes everything look better.

  1. Place the two dresses together with rich sides together lining shoulder seams up to match.
  2. Sew the two dresses together starting from the hem edge of the back opening up the back opening, around the neck and back down the other side of the back (see closeup below). Next sew each armhole edge together (see close up below). Carefully clip curves and cut sharp edge off of the corner.
  3. Turn inside out by pushing/pulling back halves through the shoulder hole.

Click to enlarge image

Close-up  of where to sew your two dresses together.

Close-up  of where to sew your two dresses together.

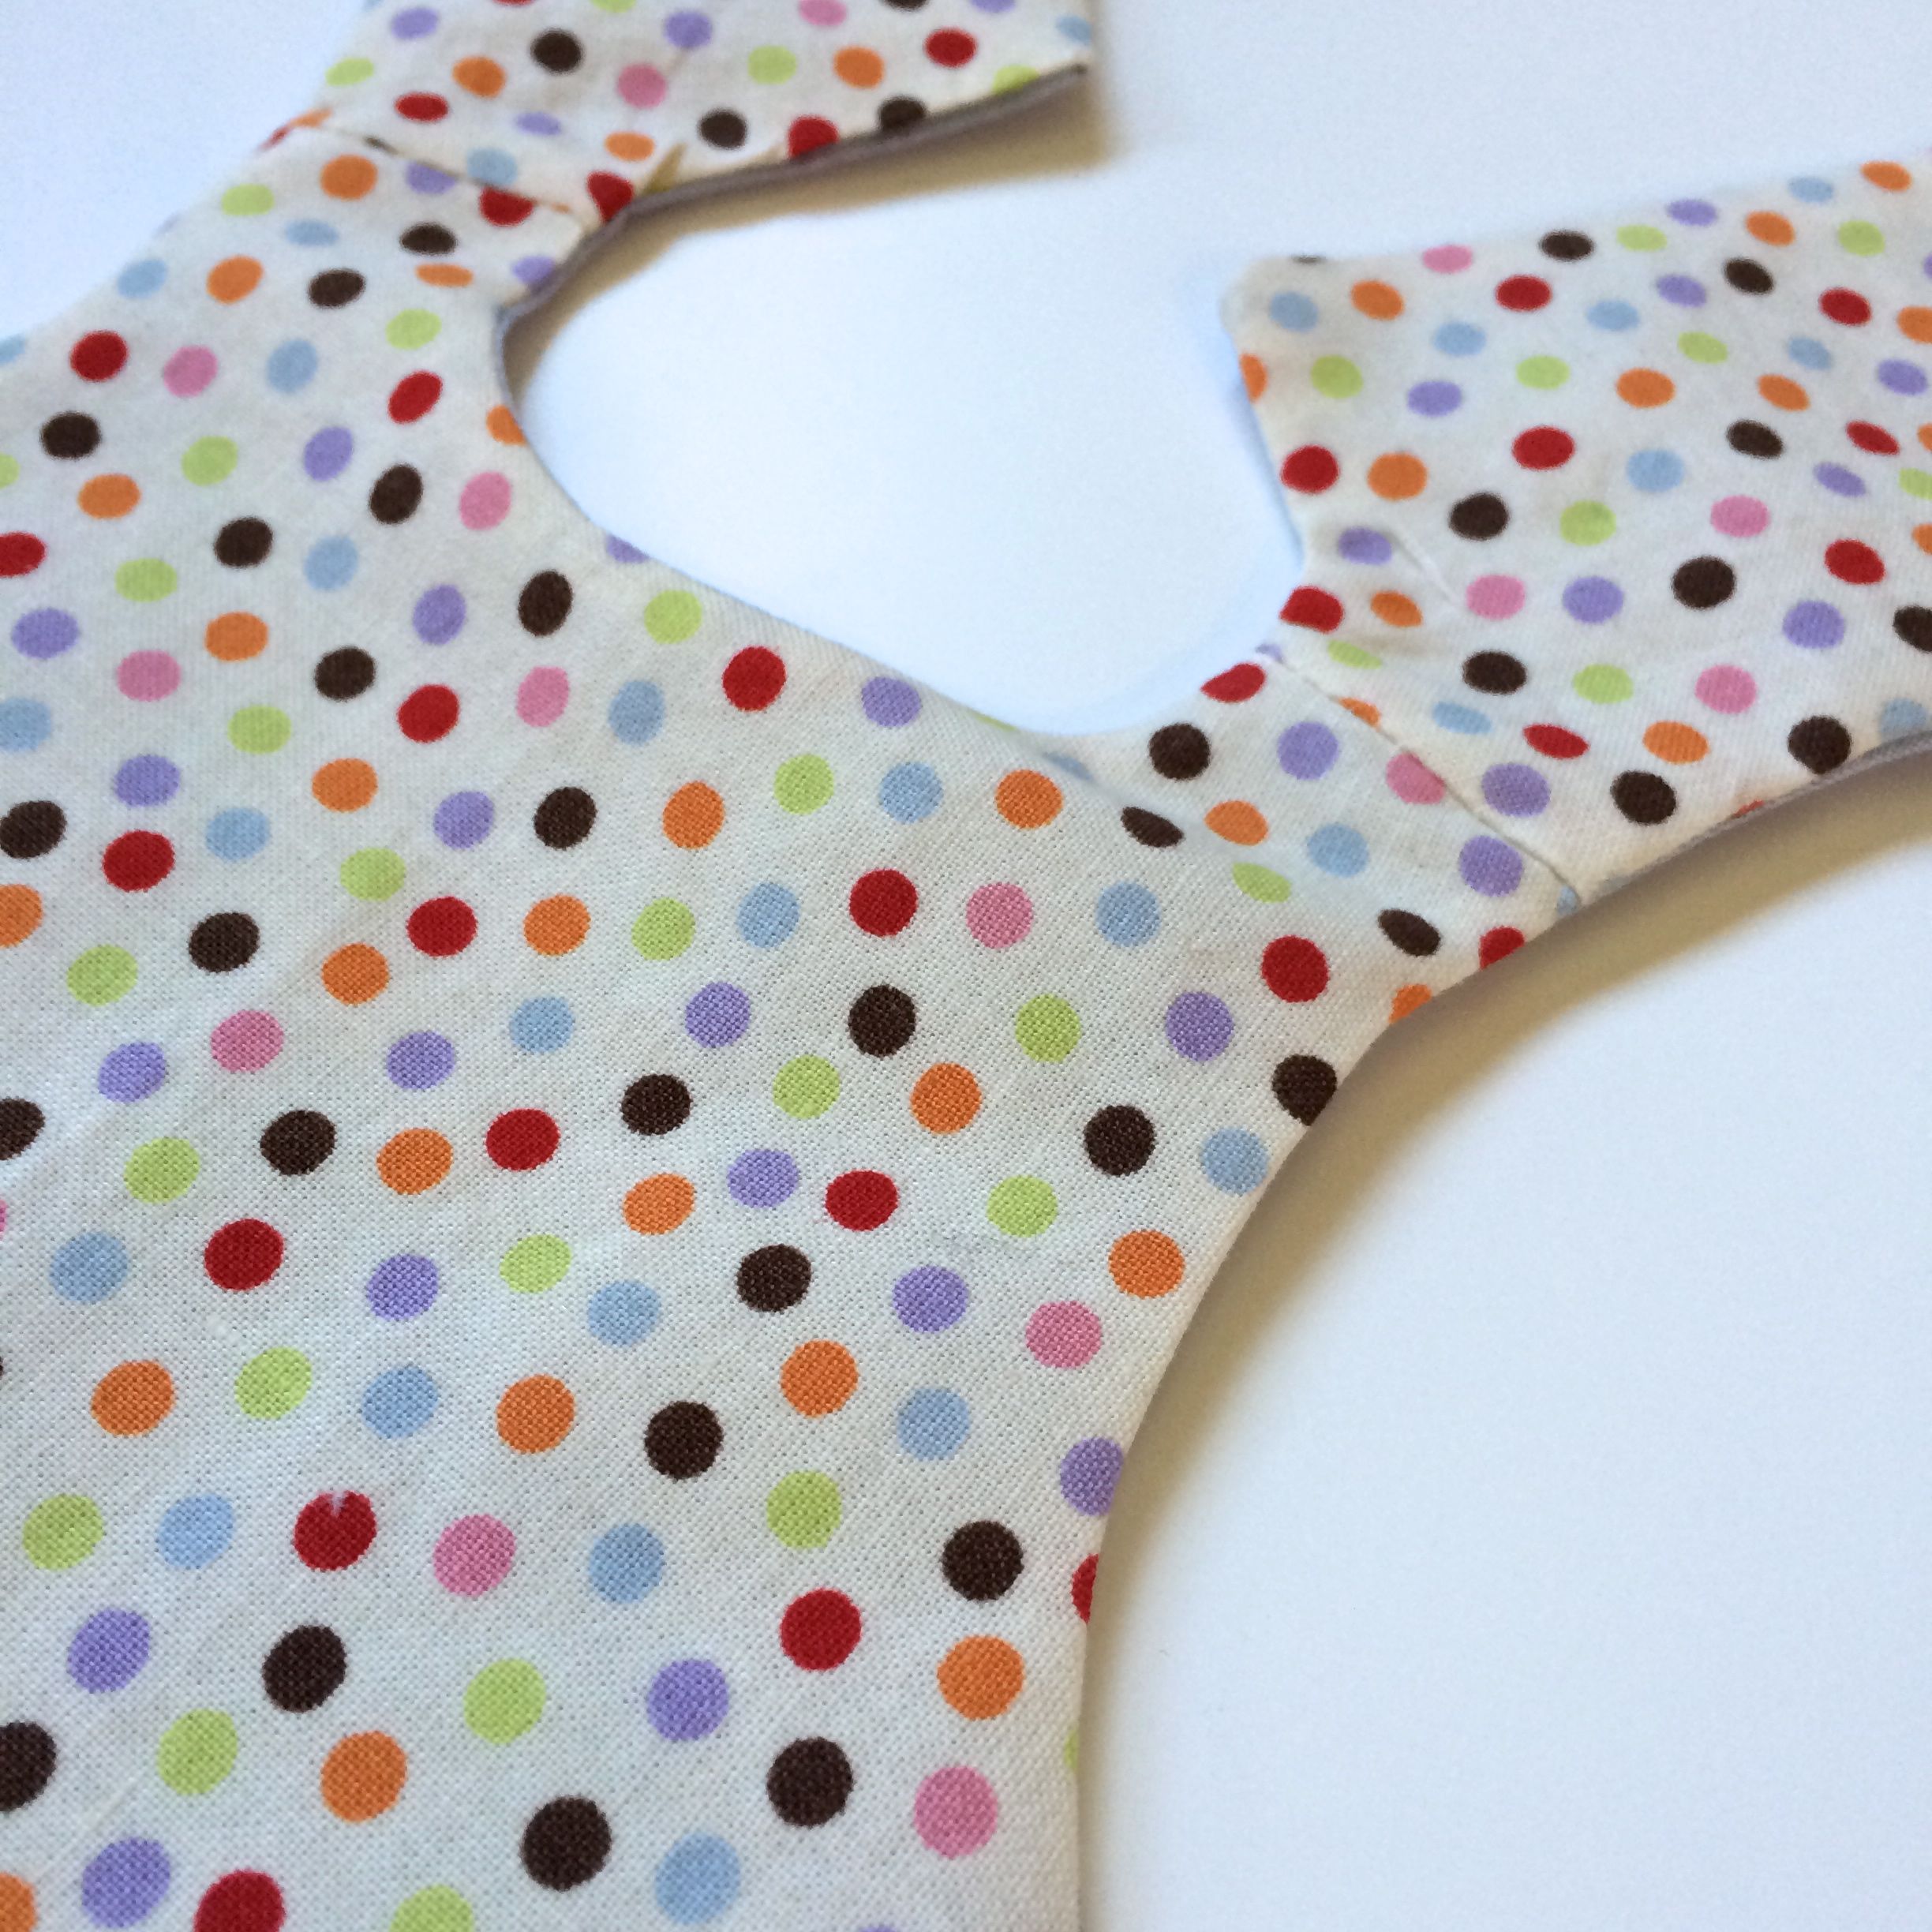
Once the dress has the right sides out, you will need to neaten things up a bit. First use a semi-pointy something to push your corners out, so they look like corners and not curves. I use a tool called The Purple Thang. But there are a number of things that will work. A size five knitting needle if it isn't too pointy. You don't want to poke straight through the fabric. then press so the edges of your seams are flat.

Use a semi pointy something to push your corners out.

Use a semi pointy something to push your corners out.

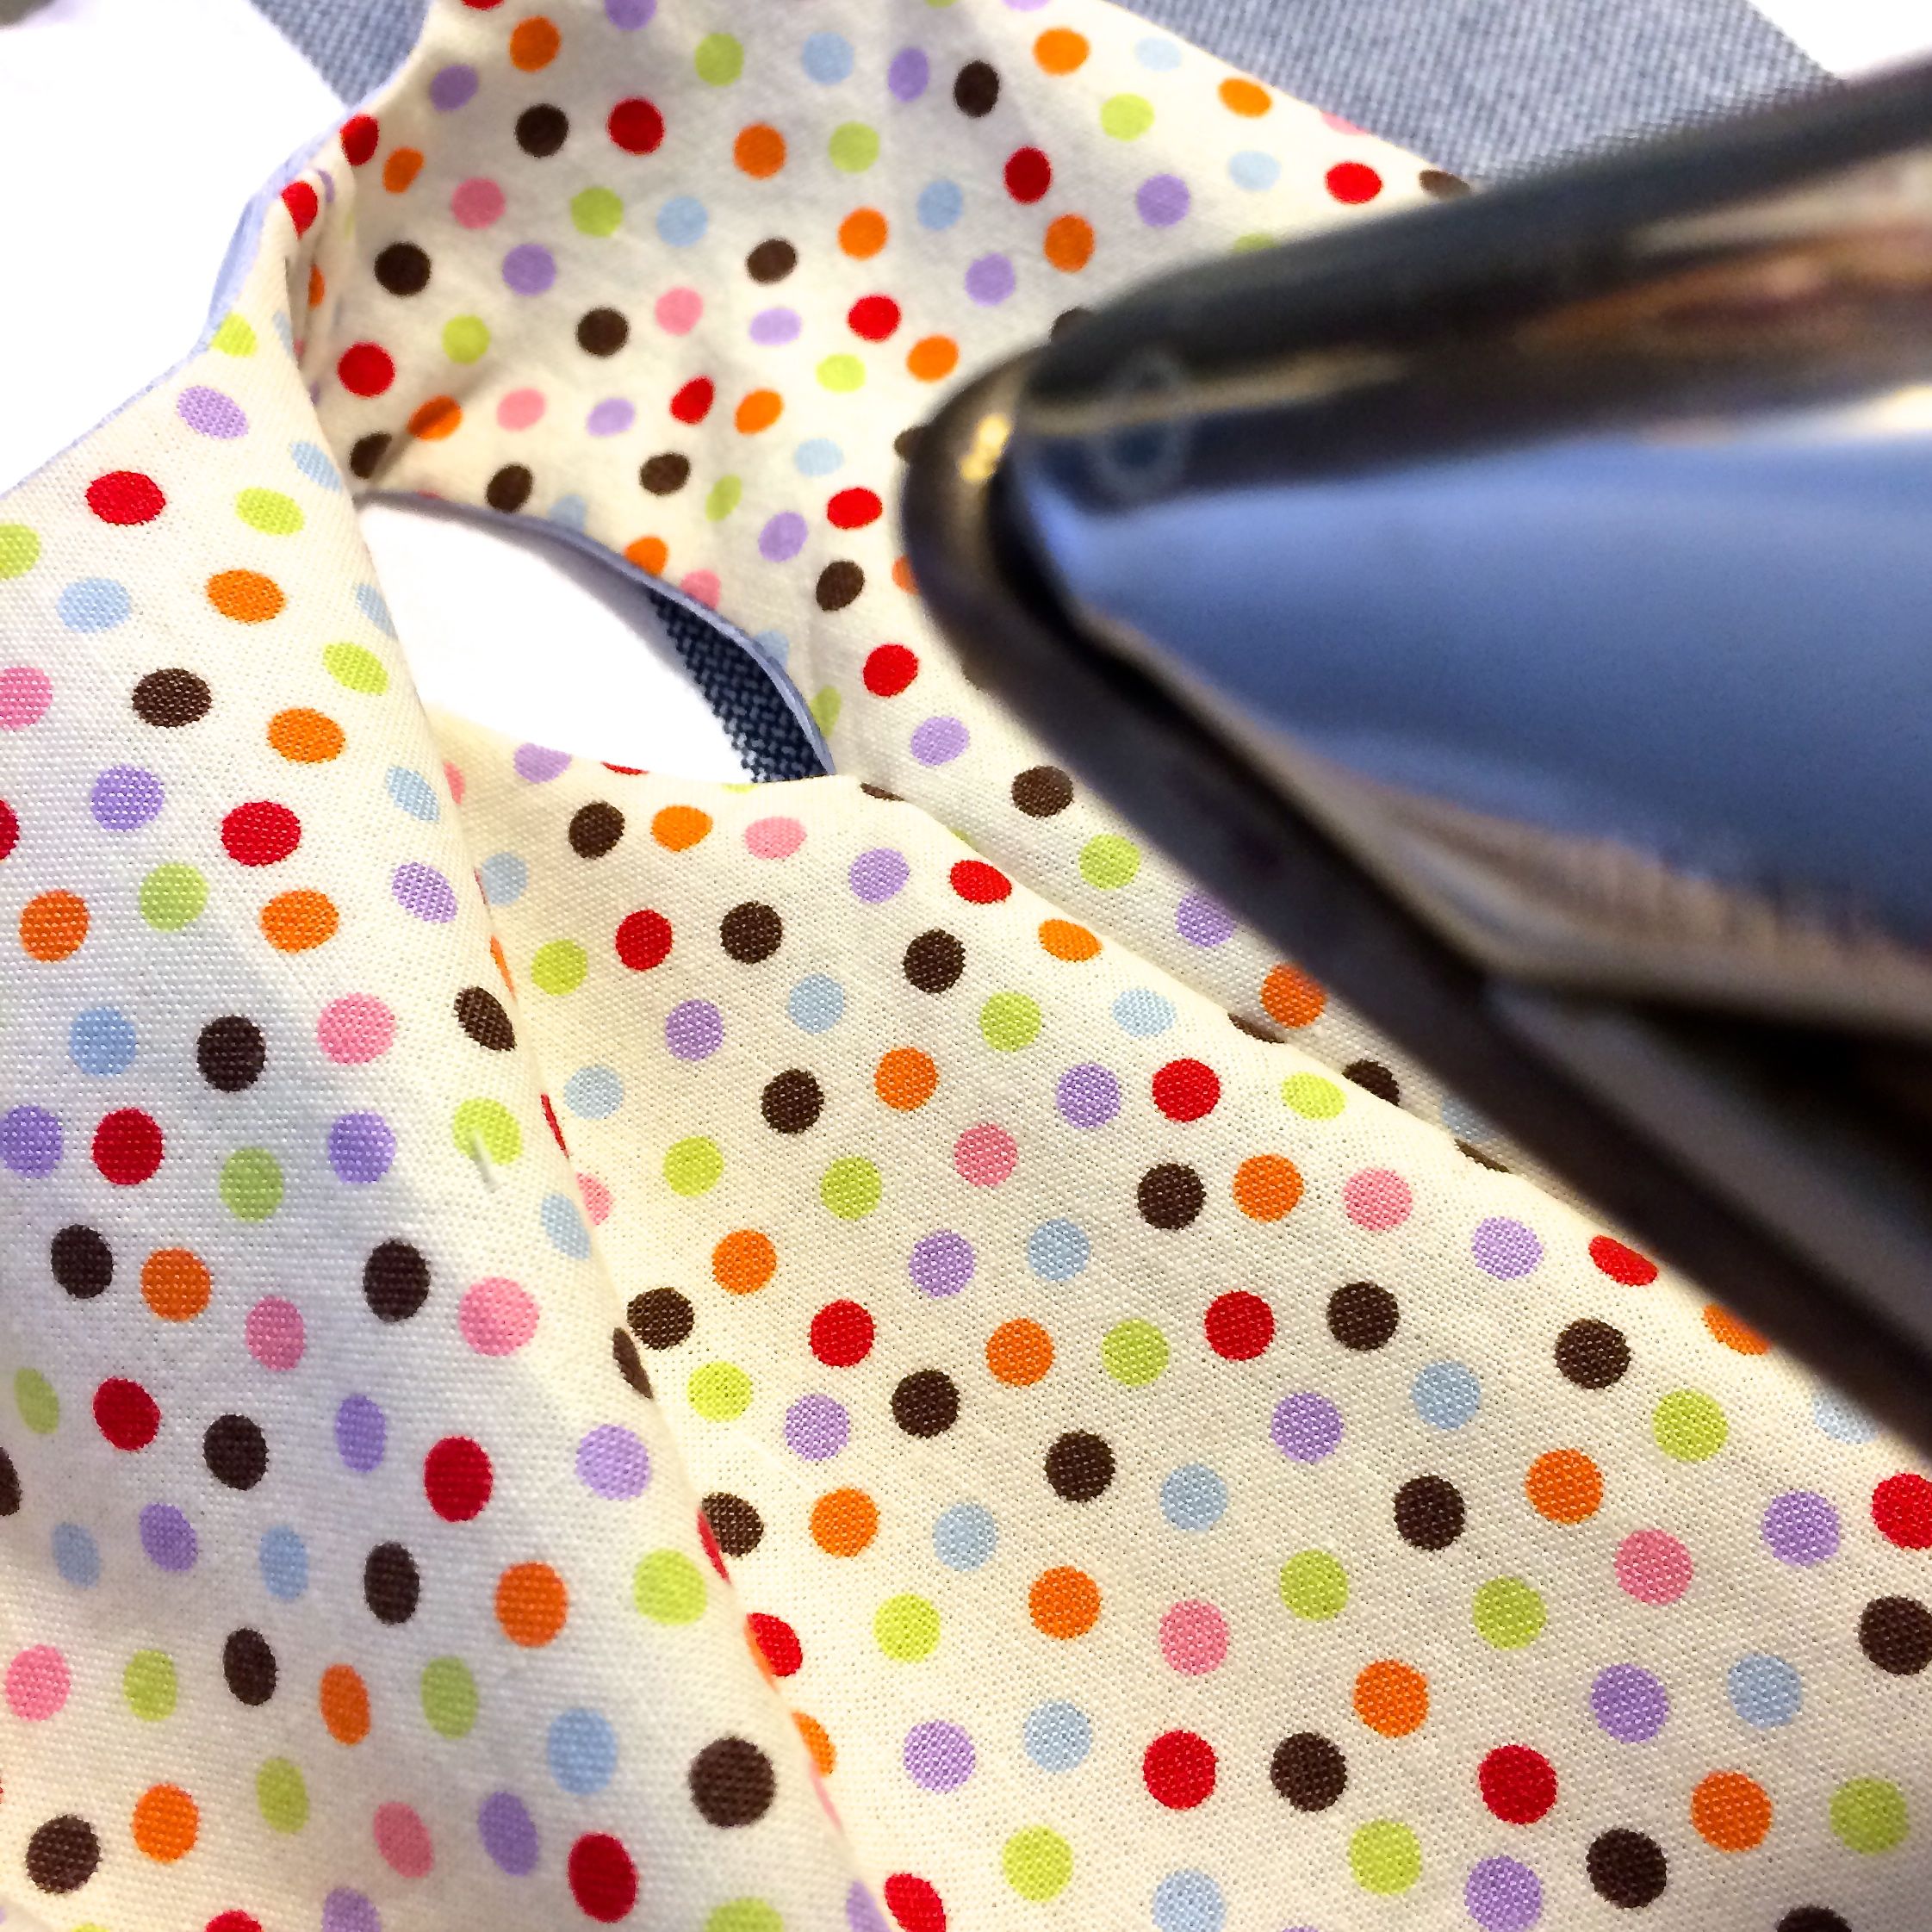
Press the neck and armhole seams.

Press the neck and armhole seams.

Next you will be sewing up the side seams, but this is done so in the end the side seams will be hidden. in other words, no inside of the dress with fraying or messy or even visible seams:

Your dress now has four bottom of armhole seams. Two on the right side of the dress, two on the left. Find them.

Match bottom of your armhole seams.

Match bottom of your armhole seams.

Pin your two right armhole seams together with right sides of the fabric together. Do the same for the left side. Pin the side seams together from hem to armhole. Notice on my fabric, I've pinned blue to blue, and dotted to dotted.

Now you will sew from the blue hem to the dotted hem with your pinned together armhole seam in the middle of these two. repeat for the other side of your dress.

Click to enlarge image

Flip your dress right sides out and press. Now only the hem and snaps are left.  You've finished all of the tricky parts. Hopefully they weren't that tricky.

You are so close to done with your reversible doll dress.

You are so close to done with your reversible doll dress.

  1. After pressing flip dress back inside out. Pin and sew hems together leaving a gap for turning back right side out.
  2. Fix your hem corners.
  3. Hand stitch up the small remaining gap in the hem. You can use whip stitch, ladder stitch or edge stitch.
  4. Add snaps and you have a dress, or kind of two.

Would love to hear back from anyone who makes a reversible or lined dress. Send photos or...problems and questions.

Doll Dressmaking Series: Facings 101

How you handle the edges of a doll dress can change the look of the dress. I am going to cover several basic ways to finish edges on a doll dress beyond the basic fold over a quarter inch and machine hem, otherwise known as a single fold hem. Very basic, (a word my older daughter uses as an insult). So what else can you do?

Single fold hem, not my first choice for edging a doll dress.

Single fold hem, not my first choice for edging a doll dress.

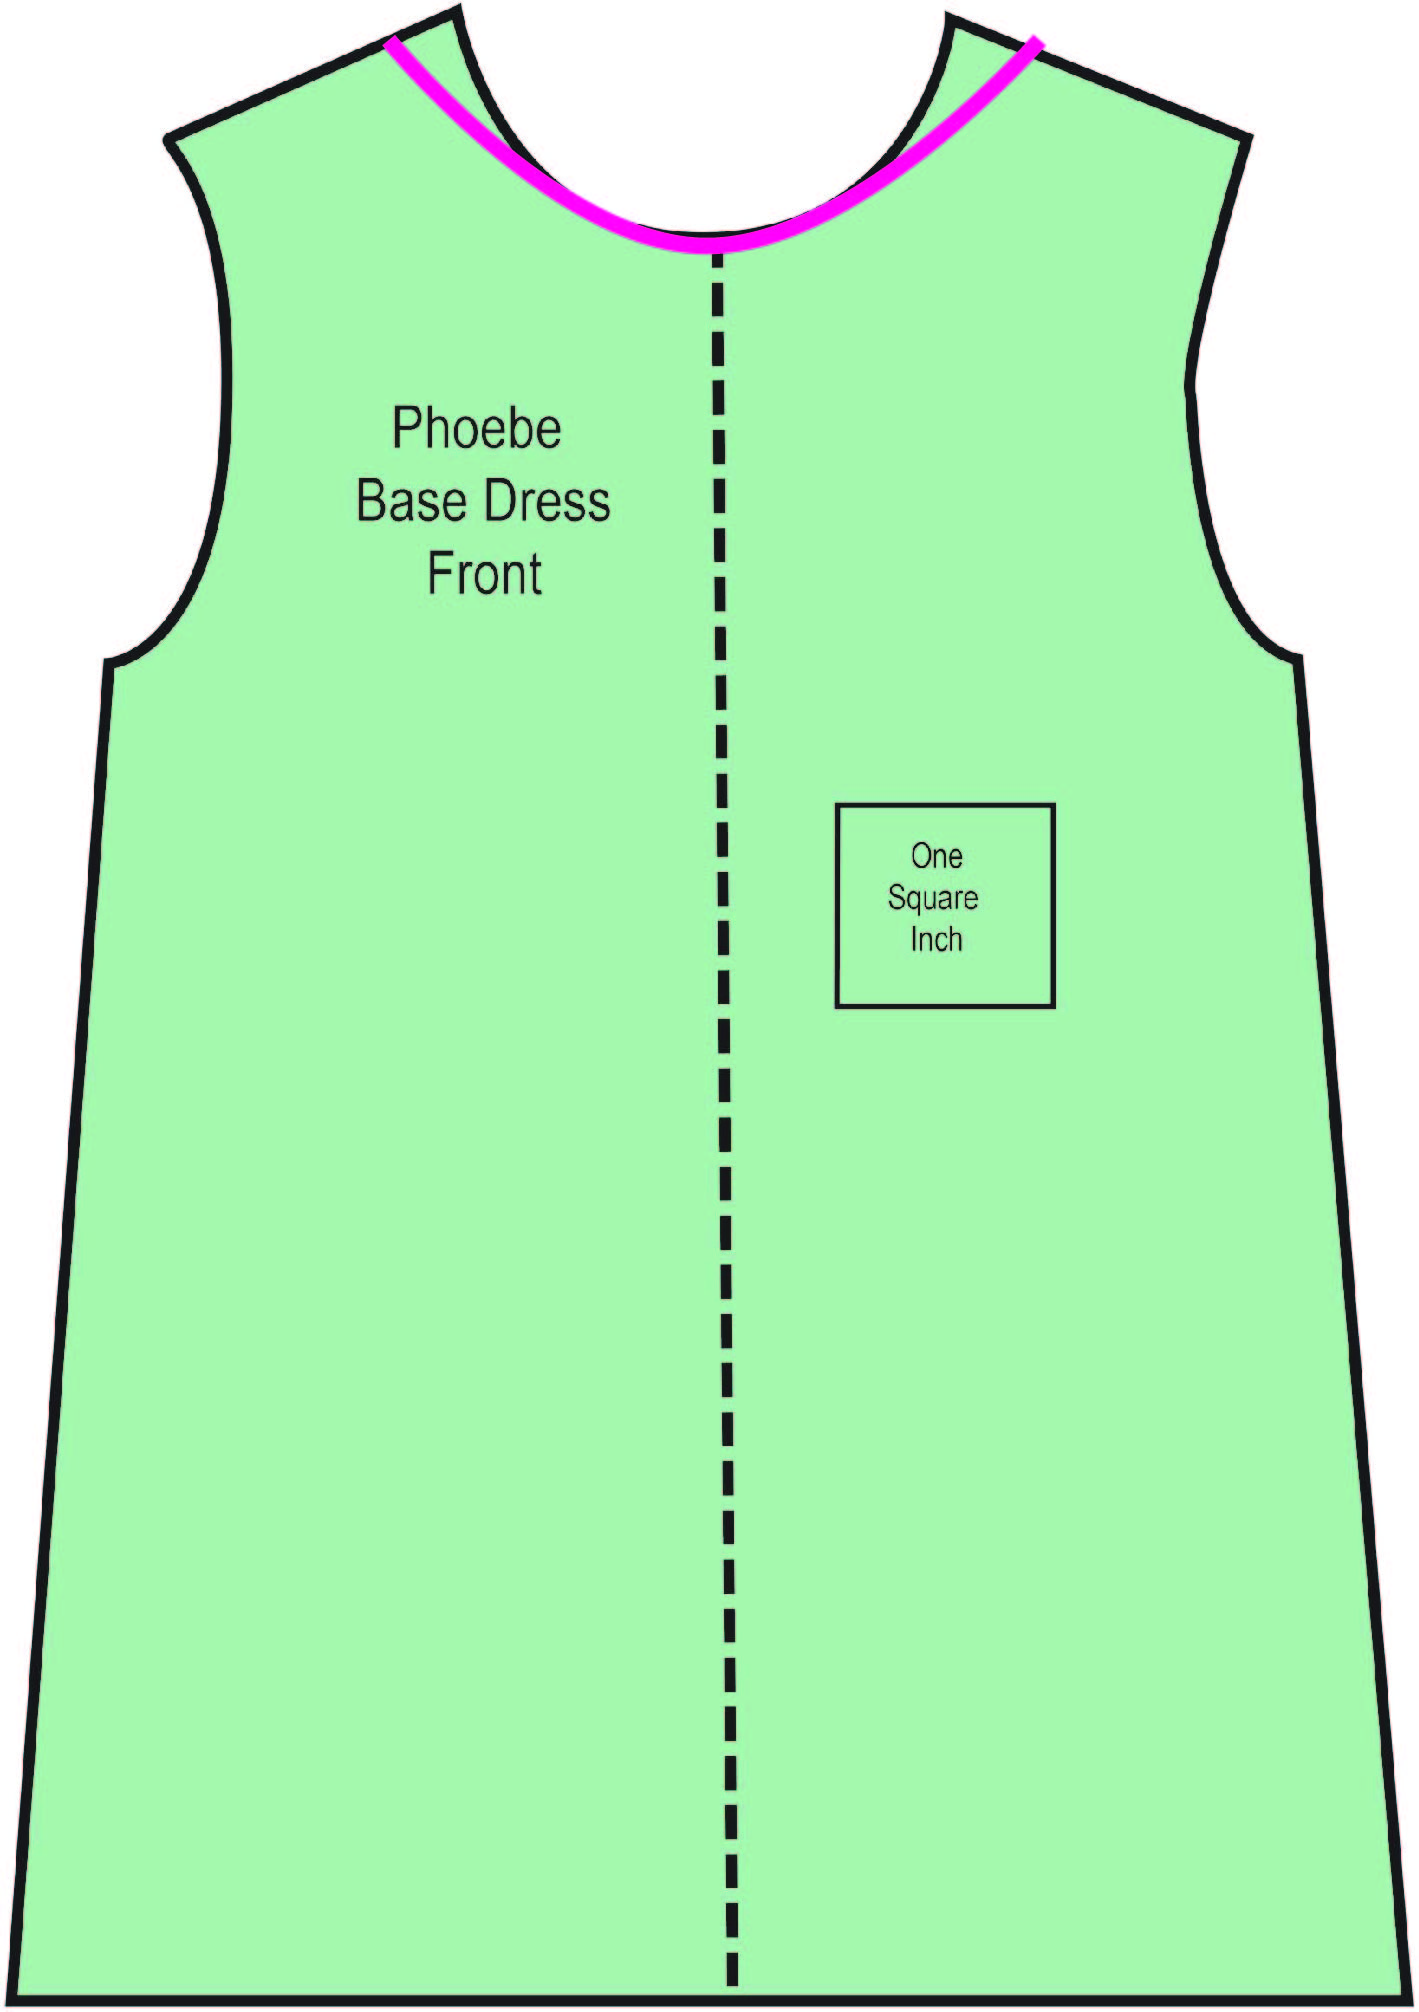
Today, I will show you how to make a simple facing for our basic dress using the basic doll dress pattern (if you don't have one use the link at the end).  The illustration below shows how to make the front facing. 

In pink, the front facing for the basic dress.

In pink, the front facing for the basic dress.

Below shows you how to draw the back facing for the basic doll dress.

Back facing for basic doll dress.

You now should have four pattern pieces, the front facing, the back facing, the dress front pattern piece, and the dress back pattern piece.

1.  Use Figure 1 as a guide for laying them out. If you are using a half of the front for your pattern piece be sure to place it on the fold, likewise for the front facing. I used contrasting fabrics, which adds an unexpected element of fun, but the facing can be the same as the dress fabric.

2. Sew should seams of the facing and the dress, as shown.

3. Press should seams.

4. Machine hem the bottoms of the facing, as shown.

Β 

Click to enlarge this image.

Pin and sew facing to dress body for neckline and the armholes RIGHT SIDES TOGETHER.

Sew from 1 to 2,

from 3 to 4, and

from 5 to 6. 

Sew neckline and armholes.

Sew neckline and armholes.

Turn right side out.

Facing turned Right Side Out.

Facing turned Right Side Out.

Sew back edges down as a single fold hem. In another lesson we will cover doublefold hem and serging. 

Single edge hems for the edge of the back.

Single edge hems for the edge of the back.

Press and your basic dress has a basic facing. You can sew up the side seams and you have a simple dress with a simple facing.

Doll dressmaking series: facings

Doll Dressmaking Series: Resizing the pattern

I have made basic dress (the starter pattern) pieces for Phoebe dolls, American Girl Dolls and a 16 inch Waldorf dolls. However, you may want to sew for a different doll. In addition, not all dolls of the same brand are the same size. American Girl doll sizes have varied quite a bit over the last 20 years. And handmade dolls like Phoebe and Waldorf dolls can vary simply because they are handmade.

There are three ways to alter the size of a pattern. In order to know how much you need to change, I suggest starting with making a crude version of the dress from the pattern you think is closest to your doll size.

For those of you new to sewing, click here for the basic steps for making the basic fitting dress.

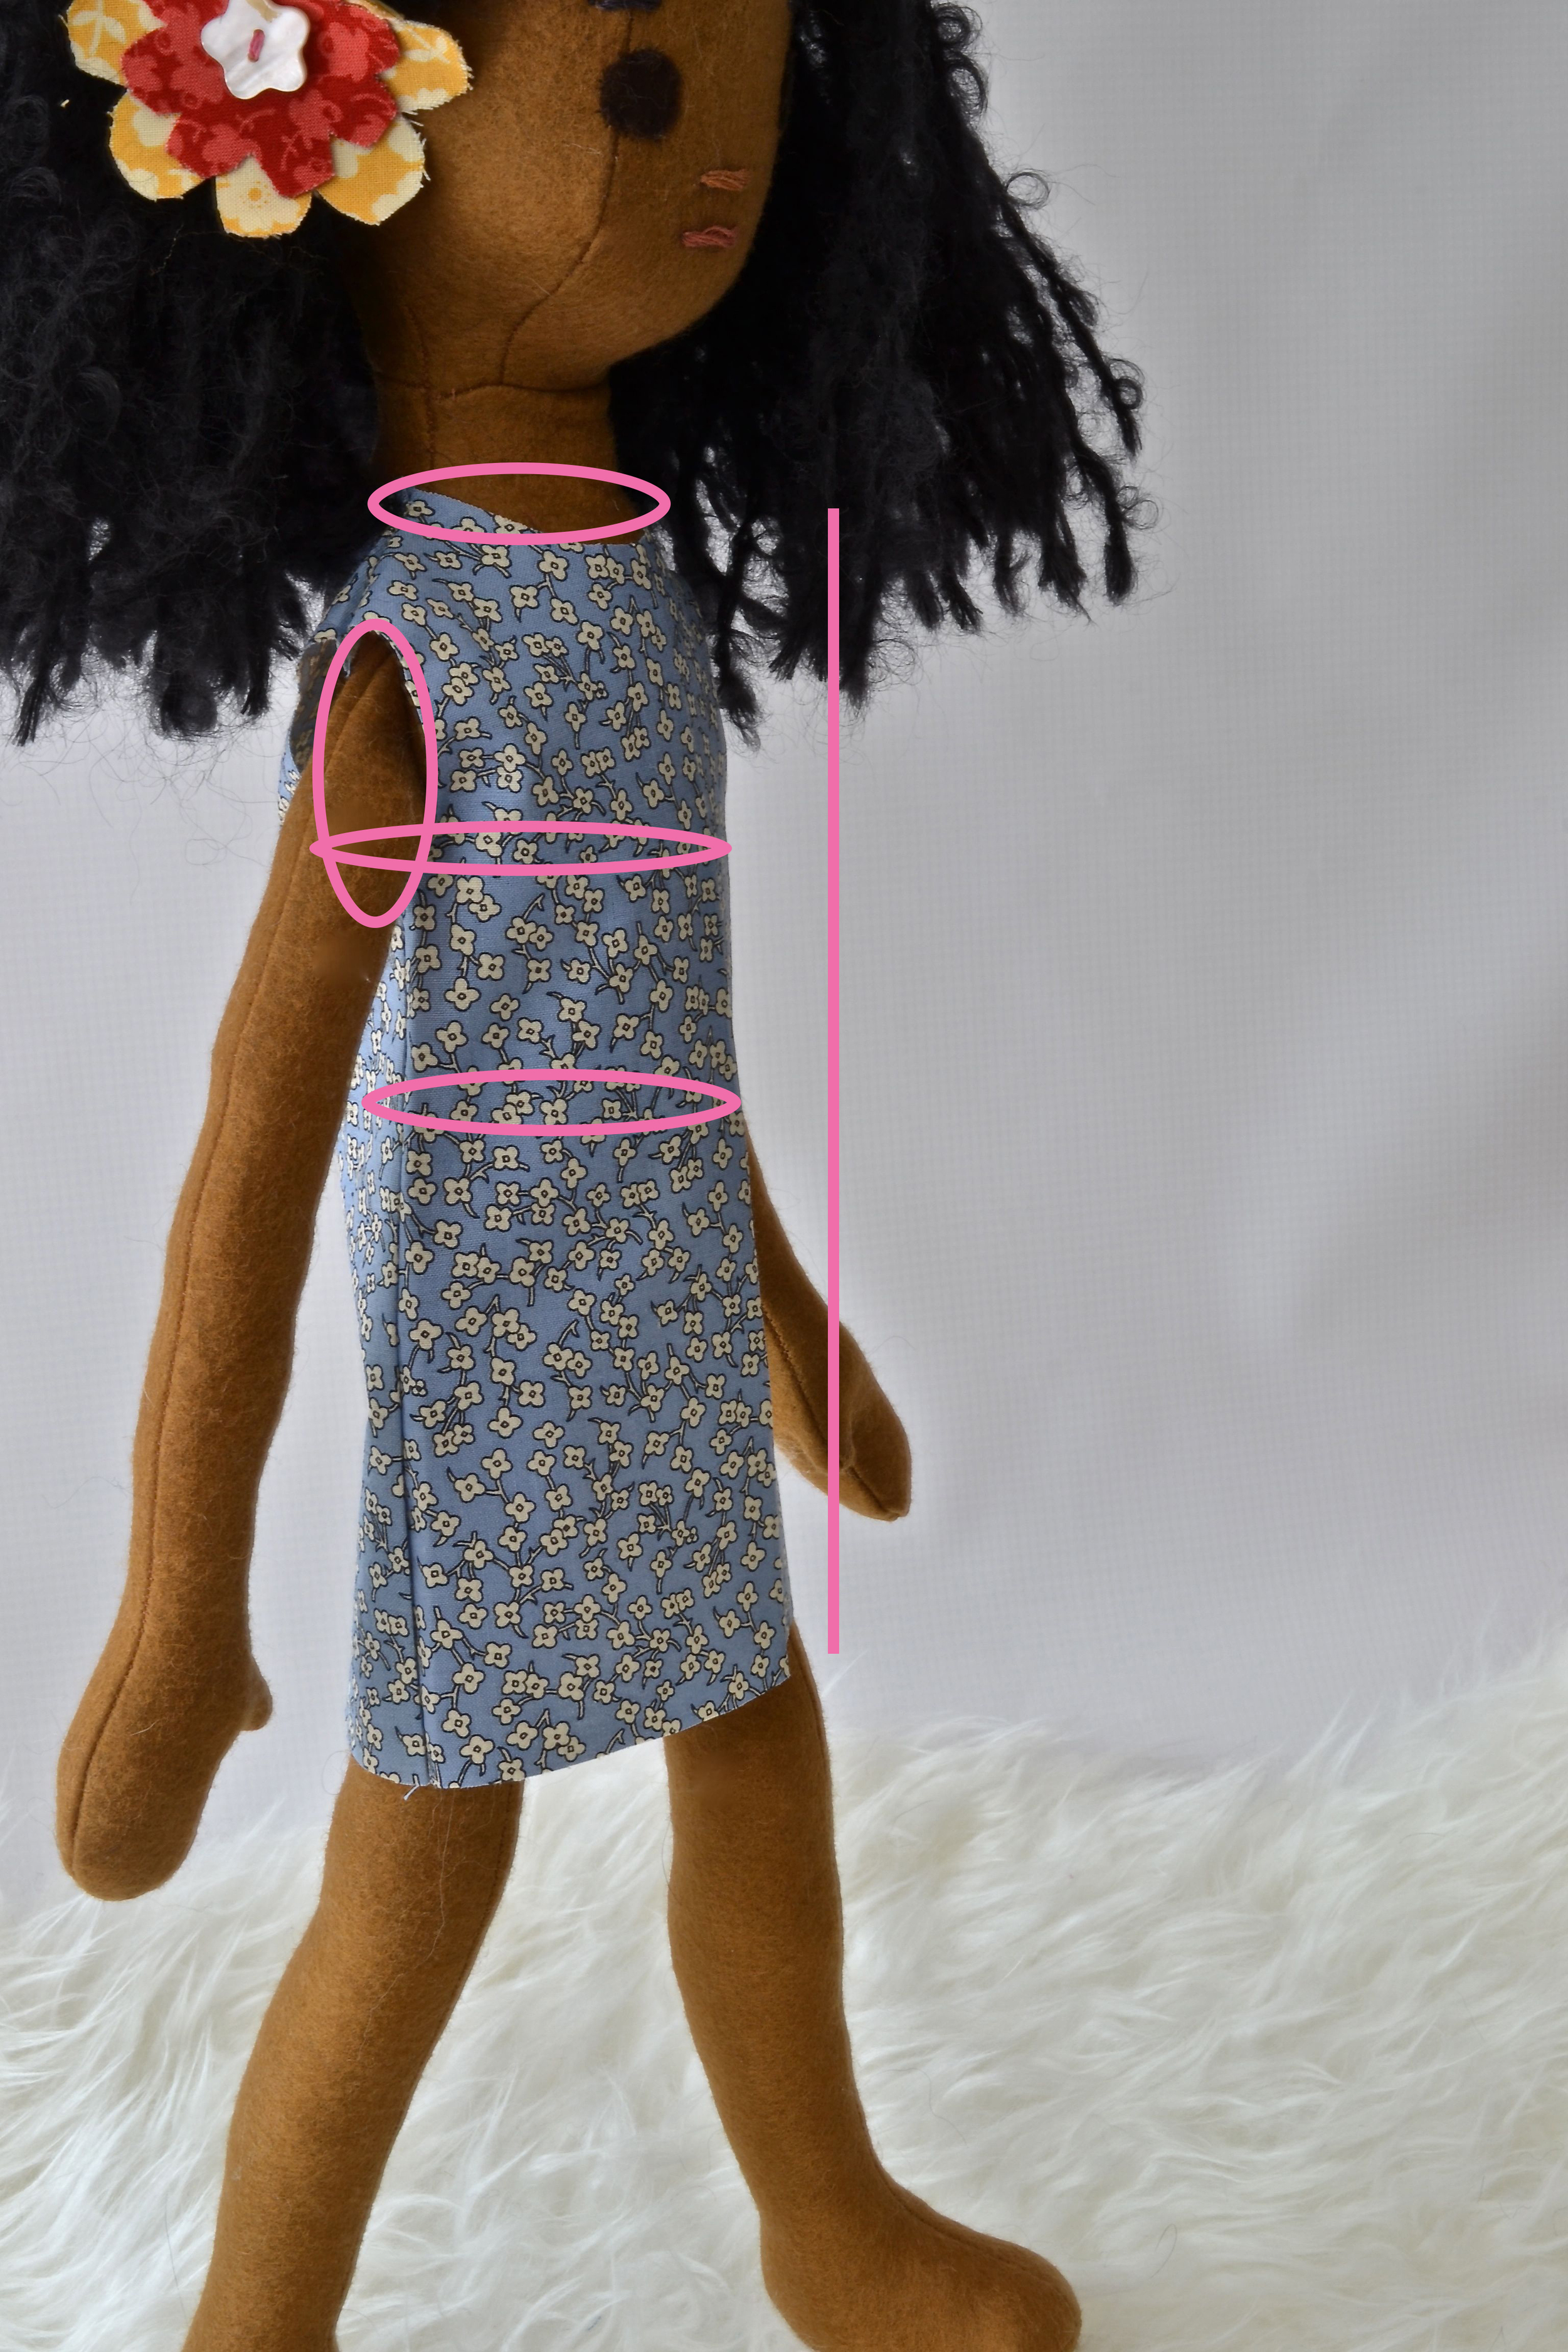
Key areas for adjusting fit in a doll dress

Key areas for adjusting fit in a doll dress

Once you have made that dress, try it on your doll.  and answer the following questions:

  1. Is it too big or too small?
  2. Is it too big or too small all over or in just one or two places? Look at the neck hole, armholes, chest and waist.
  3. How is the length? Remember to take into account a 1 inch hem.

There are three ways to alter a pattern to fit. Which way you go with depends on what type of size change you are attempting.

Too Big or Too Small Overall

If the pattern is overall too big or too small (meaning neck, chest AND armholes), you can easily adjust the pattern with an enlargement or reduction on the copier.  It just requires a bit of math. If a doll's chest is 10 inches and you need 11, then copy it at 110%. Or you can use the pattern pieces to do the math. If a 6.5 inch pattern piece needs to be 7.5, divide 7.5 by 6.5 and you get the percentage of enlargement, 115%. 

Using a copier to change pattern size

Using a copier to change pattern size

Three things to remember about using the copier to enlarge or reduce. 

1. It only really works if all of the measurements need to be uniformly (or almost uniformly) reduced or enlarged.

2 It should not be used for making a dress pattern longer or shorter, just for circumference changes. A doll may be taller but thinner, so the dress's width should not be increased, just length, which is easy to do without the copier.

3. You are also enlarging/reducing the seam allowance. If you are only changing the pattern within 20%, this won't matter so much, but more than that can have an impact. Most doll clothes are sewn with a 3/8 inch seam allowance.

Just Need to Increase the Width

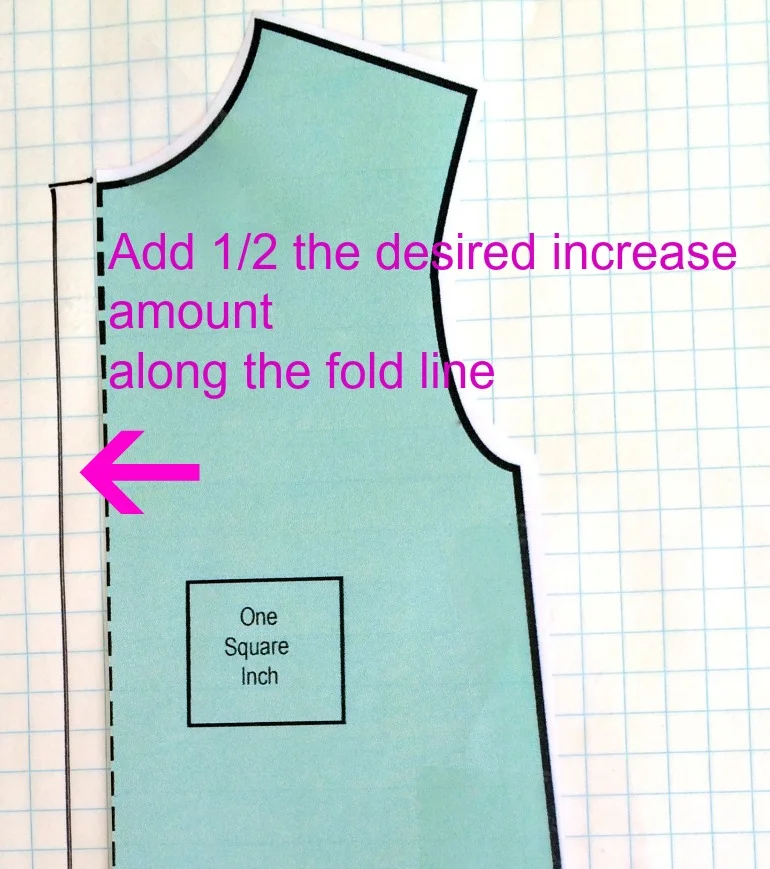
Okay so the armholes are loose enough, but the dress is snug. This can be done by adding a segment onto your pattern piece either with tracing paper or by taping your pattern piece on a piece of graph paper. See sketch below.

If the dress front is one inch too narrow, add a half of an inch to the fold edge. You can create a new pattern either by cutting out the graph paper with the taped on piece.

Altering a pattern piece for width only

Altering a pattern piece for width only

Just the Neck is Too Tight

Some dolls have narrow necks, some dolls have wide necks. If it is just the neck that is not fitting, the fix is quite simple. You can draw a wider neck on the pattern piece as depicted below. A bit of guess work is involved. But it doesn't take that long to make a sizing dress to try. Or you can cut your sizing dress until it fits and work backwards.

Neckline change.jpg

Next, facings and linings.

Doll Dressmaking Series: Base Patterns are ready

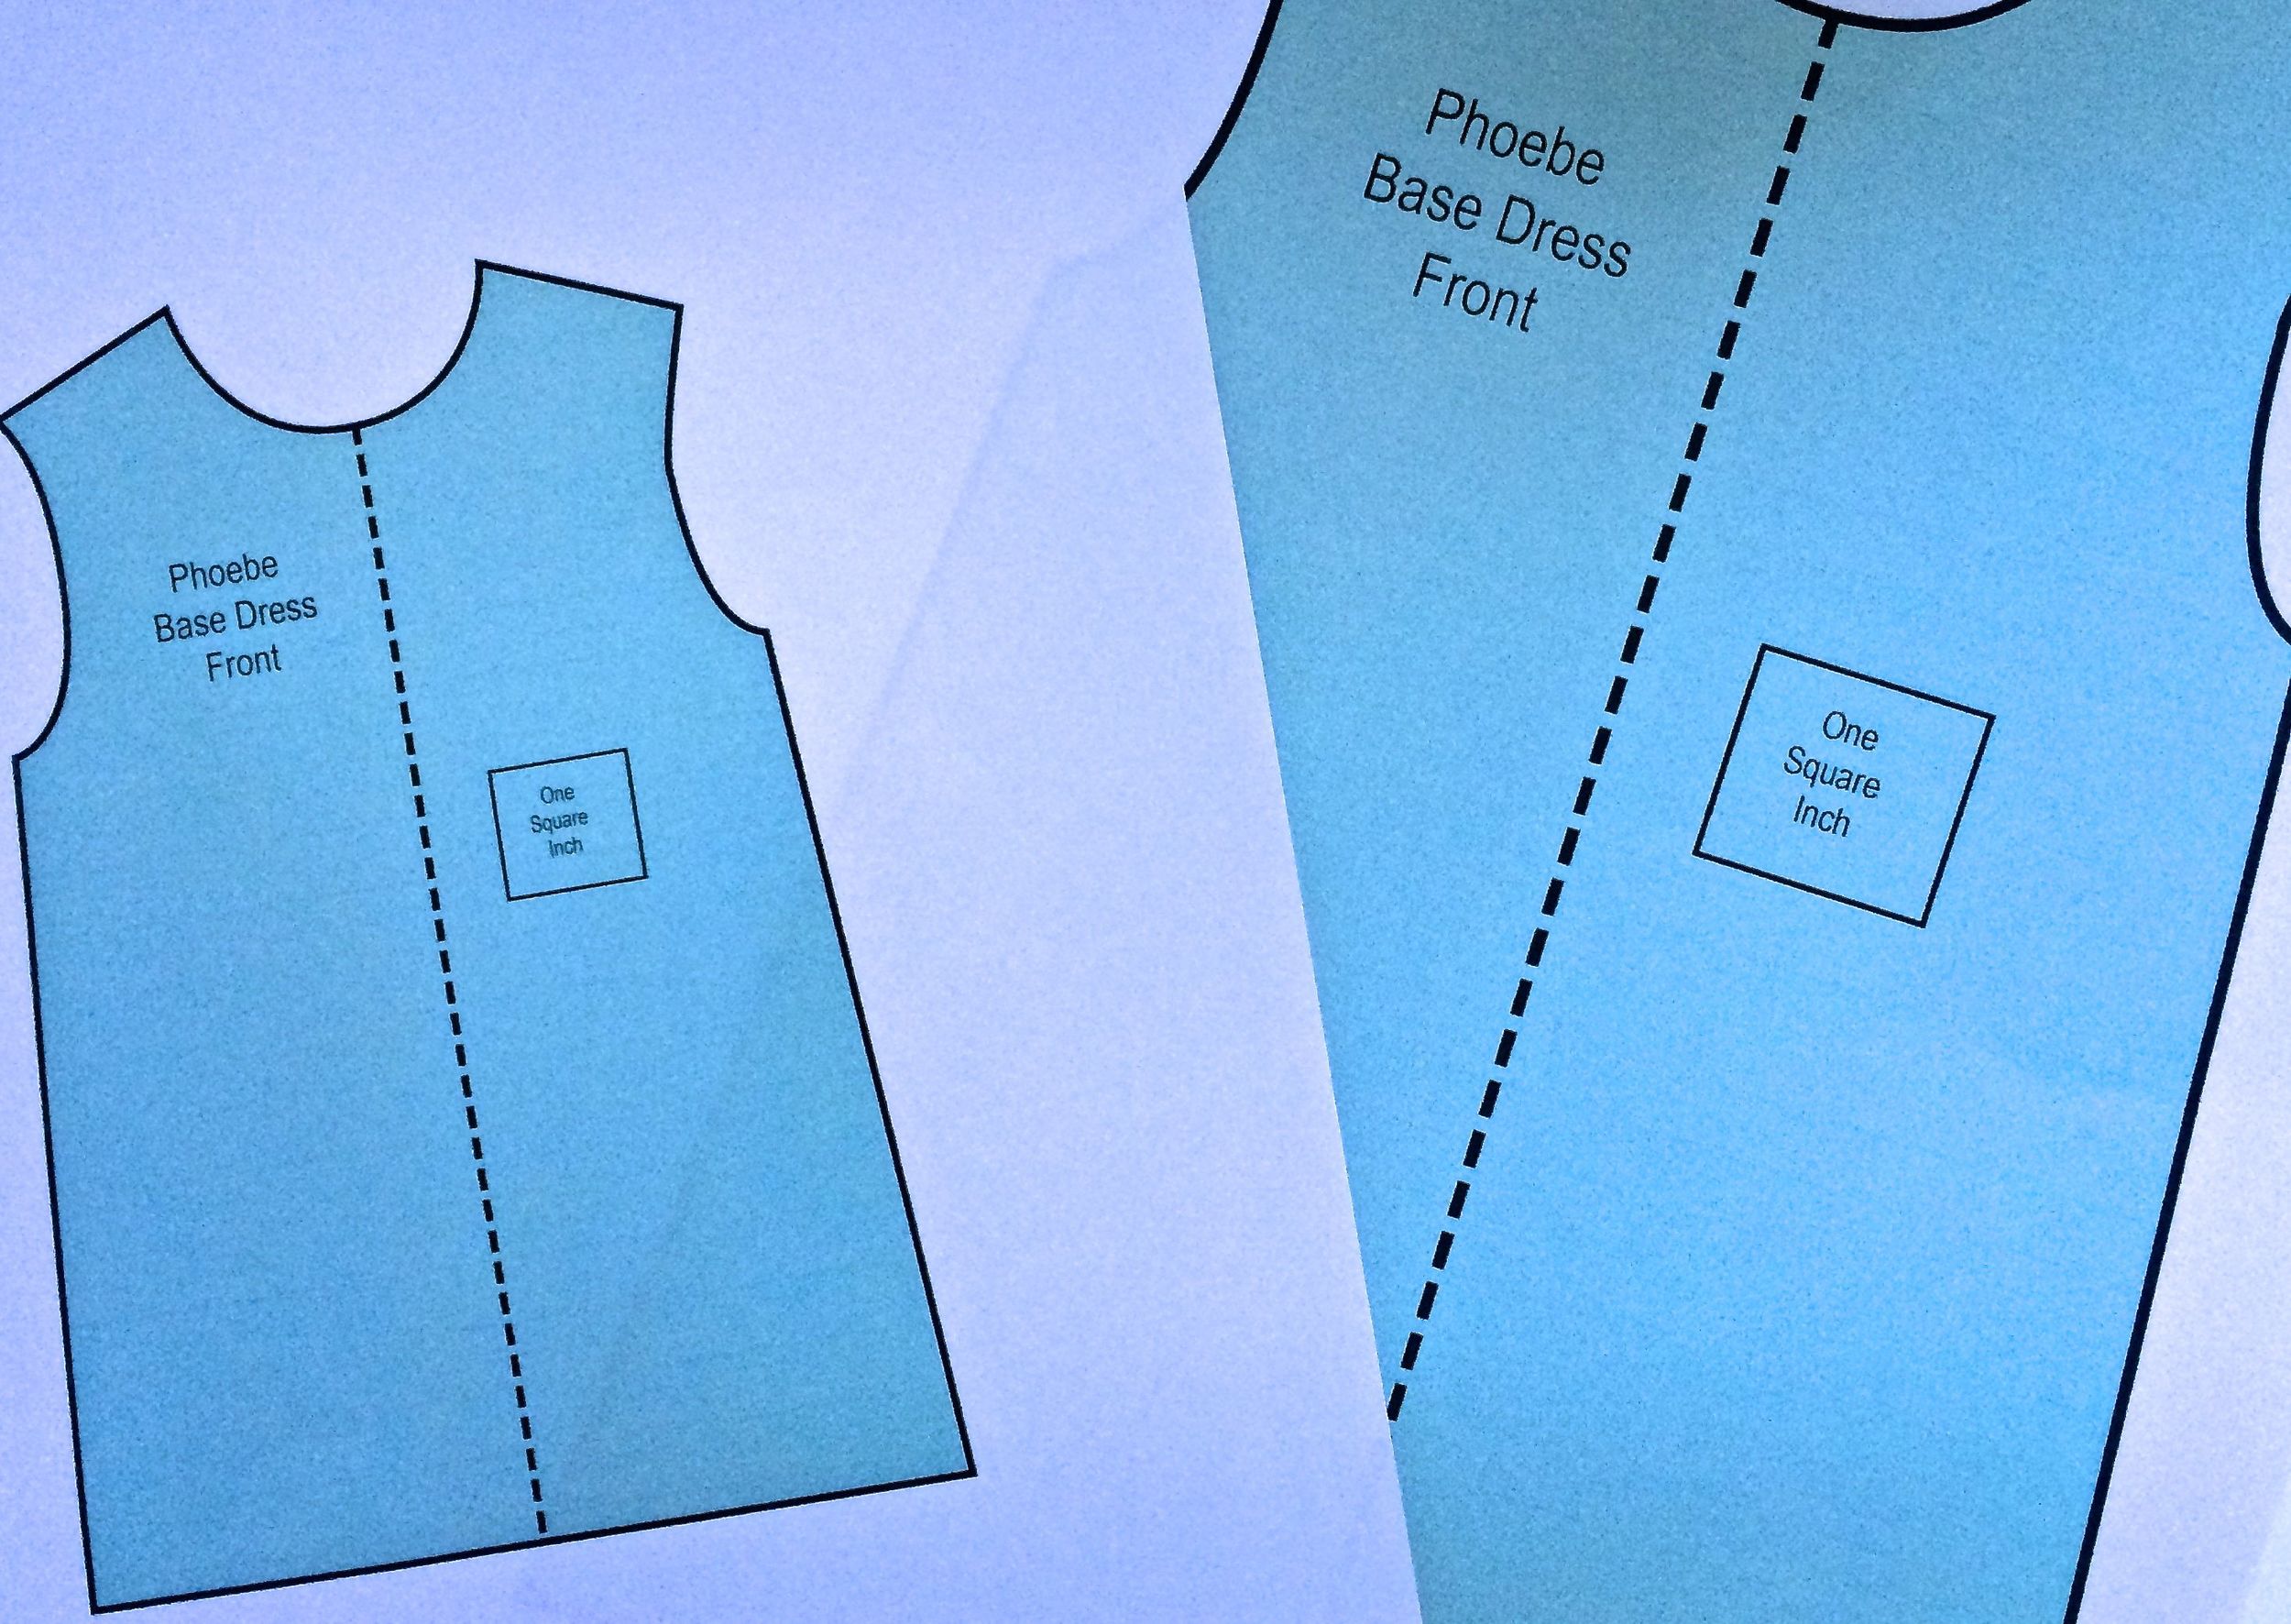
I have heard from a number of people that they are excited for this doll dressmaking series. I am too! I hope to teach both how to make patterns for a variety of dress styles from a base pattern and some techniques to help you sew small.

I know I said the base patterns would be done on Monday. I have been working hard both to learn Illustrator and trying to figure out how to post the patterns so everyone can download them easily. The good news is the base dress patterns are ready for Phoebe, American Girl Dolls and 16 inch Waldorf dolls. So yay! We can begin!

The second part of the news is there is no simple way through Squarespace (the people who host this website) to upload the patterns so you can download them. So here's how it will work: I have made a form at the end of this post, just email which ones you want and I will send the PDFs to you. 

I have started with these three sizes because I am assuming they are the most popular, but I am willing to add another size Waldorf or Toddler Phoebe if there is interest. But I will also be showing you how to adjust this pattern to fit a slightly different size doll. So no matter what, you win.

A series on designing and making doll dresses. 

A series on designing and making doll dresses. 

Please fill out the form at the bottom and I will send you the PDF of the pattern, Once you have that you can begin.

The next blog post is the first lesson to start once you have your pattern pieces.

The base pattern

The base pattern

The base pattern is where we start. Next lesson, making sure it fits your doll!

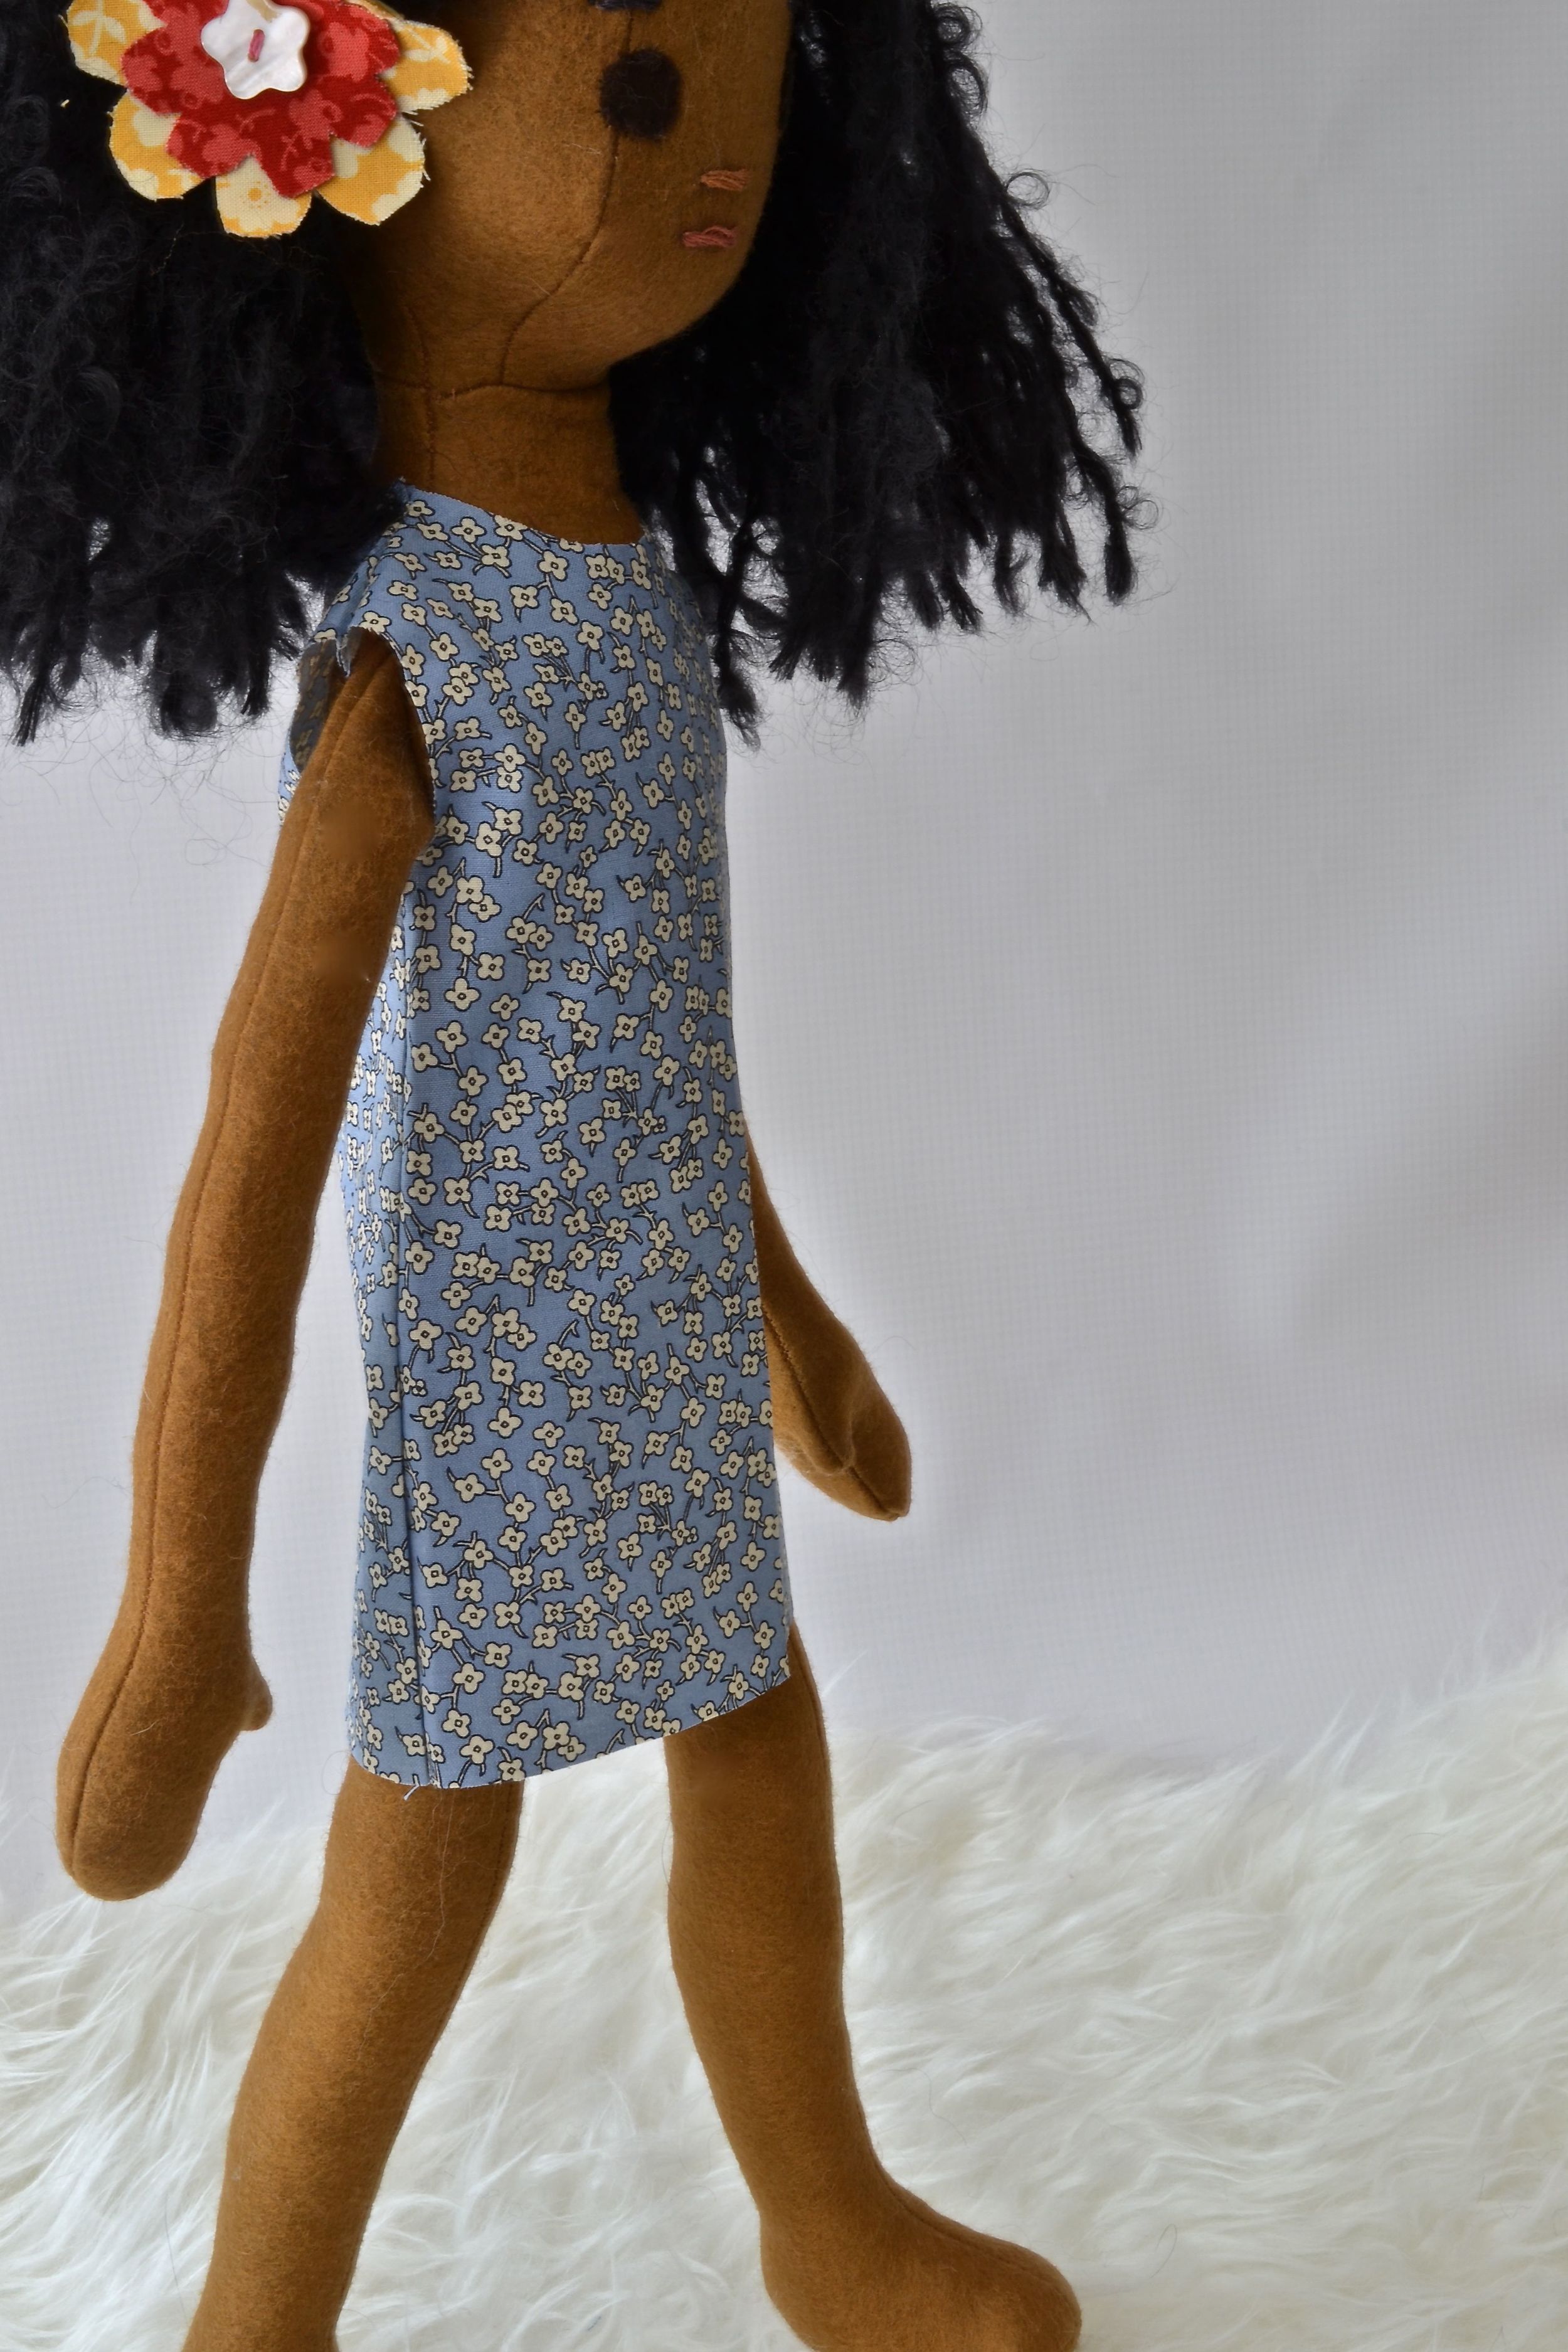
Phoebe modeling the base pattern pieces.

Phoebe modeling the base pattern pieces.

Subscribe to my newsletter to receive all pattern pieces, past, present and future.

Subscribe to our mailing list

* indicates required

Doll Dressmaking: Useful Tools

Later this week I will be uploading a basic doll dress base for us to start the lessons with. I will use this base to teach some sewing techniques and some basic pattern drafting.

To even begin, you will most likely need to make some very rudimentary adjustments to ensure the pattern base fits your doll. So before altering this base pattern, I thought I'd show you my favorite pattern making and altering tools. 

The most basic tool: a measuring tape. You will need to know lengths and circumferences of various parts of your doll before you make adjustments.

Basic

Basic

You will need to alter pattern pieces. This is best done by tracing with a pencil and tracing paper. Lots of erasing. More tracing. And sometimes getting a bit more accurate with graph paper. And when you think all is good, drawing a clean final version with a medium tipped black marker.

kind of basic

kind of basic

Although you can use tracing paper for your pattern pieces, I prefer freezer paper. You can trace onto it. And then you can iron the pieces onto your fabric for accurate and easy cutting. You can even copy onto it. Amazon sells sheets that go through your copier, which allows for easy replicating, enlarging and reducing. You can also just get a roll at the grocery store for a lot less money.

luxury items

luxury items

Coming in the next few days...the base dress pattern pieces for a variety of dolls. Adobe illustrator and I are becoming friends (sort of) as I try to create these.